
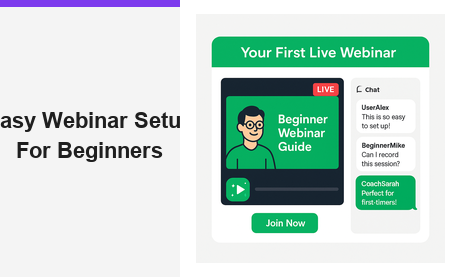
Easy webinar setup for beginners is now within reach for anyone with a browser and an internet connection. For years, hosting a webinar felt like a challenge best left to IT professionals. However, modern platforms like Pageinar, the instant webinar broadcast platform, have changed everything. In this guide, you will learn exactly how to go live, collect attendees, and deliver a polished online event. Moreover, you will do all of this without installing a single plugin or writing one line of code.
Why Easy Webinar Setup for Beginners Is a Game Changer
Traditionally, setting up a webinar required expensive software, complex configurations, and a steep learning curve. As a result, many small business owners, coaches, and educators gave up before they ever went live. Today, easy webinar setup for beginners is a real possibility because hosted platforms handle all the technical work for you. Therefore, you can focus entirely on your content and your audience instead of fighting with software settings.
In fact, according to web conferencing research, virtual events have become one of the top digital engagement strategies for businesses of all sizes. Furthermore, beginners who use streamlined platforms consistently report higher audience engagement than those struggling with complex tools. In short, the right platform makes all the difference when you are just starting out.
What You Need Before Your Easy Webinar Setup for Beginners
Before you begin your easy webinar setup for beginners, gather a few essentials. First, you need a stable internet connection with good upload speed. Second, prepare a topic or agenda for your session so you stay focused. Third, have a Google account ready, since Pageinar uses Google login only. Additionally, think about a cover image or background for your broadcast landing page. Finally, decide how many attendees you expect, as this will guide your subscription plan choice.
You do not need to install any software on your computer. Moreover, your attendees will not need to install anything either. They simply click your shared URL and join the event directly in their browser. This frictionless experience is one of the biggest advantages of using Pageinar for hosting your first webinar. Together, these small preparations will set you up for a smooth and confident first broadcast.
Step-by-Step Easy Webinar Setup for Beginners on Pageinar
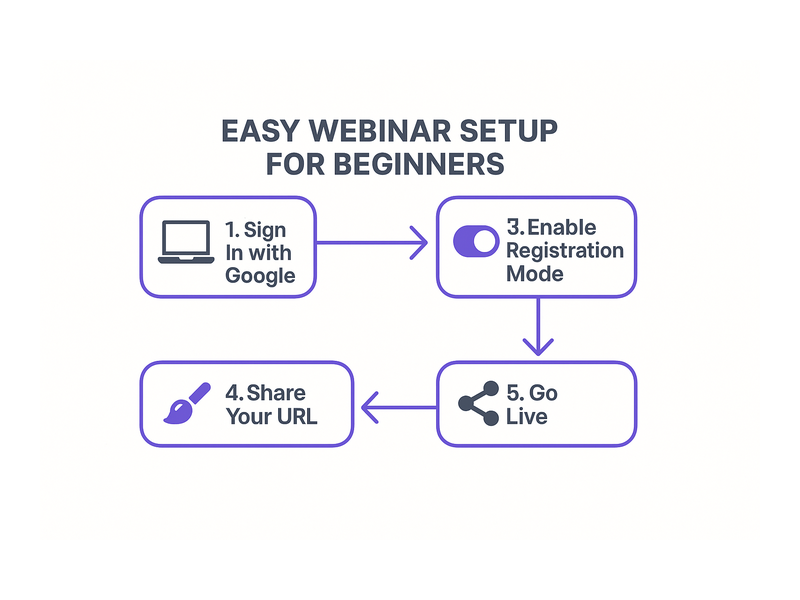
Following these steps will get you from sign-up to live broadcast in under ten minutes. Additionally, each step is designed with complete beginners in mind, so you will not feel overwhelmed at any point in the process.
Step 1: Sign In with Google
Visit pageinar.com and click the Google login button on the homepage. There is no separate registration form and no password to remember. As a result, you land directly on your main broadcast landing page immediately after signing in. This page becomes your webinar home base and is fully editable from day one.
Step 2: Customize Your Broadcast Landing Page
Your main page is the first thing attendees will see when they click your link. Therefore, take a few minutes to personalize it. Click on the cover area to upload a background image or choose a solid background color. Add your avatar photo, your webinar title, and a short compelling description. Furthermore, include your website URL so viewers can learn more about you after the event. These small touches make your easy webinar setup for beginners look polished and professional from the start.
Step 3: Switch to Registration Mode
Pageinar offers two page modes: Registration Mode and Broadcasting Mode. For most beginners, Registration Mode is the best starting point because it lets you collect attendee details before going live. First, toggle the mode switch at the top right of your page. Additionally, open the Settings panel by clicking the gear icon. In the Registration Settings section, you can set the event date and time, choose a landing page template, and configure which lead fields to display. For example, collect first name, last name, company name, and email address before the event begins.
If you want to learn more about this feature, check out the Pageinar Knowledge Base article on how to collect leads before the broadcasting event. In short, Registration Mode transforms your landing page into a pre-event sign-up funnel automatically, with zero extra tools required.
Step 4: Share Your Page URL
Once your page is set up and looking great, copy the URL from your browser address bar. Then share it via email, social media, messaging apps, or any channel where your audience is active. Attendees click the link, land on your registration page, and sign up instantly. As a result, you build your attendee list before you even go live. This pre-event lead capture is one of the most powerful features of easy webinar setup for beginners on Pageinar.
Step 5: Go Live
When it is time to broadcast, switch your page to Broadcasting Mode using the toggle at the top right. Then click the Start Broadcast button in the bottom-right panel of your page. Your page instantly displays a LIVE status indicator to all visitors. Furthermore, the integrated RumbleTalk chat panel activates so attendees can send messages and questions in real time. For a deeper look at the platform, read our post on Unlock the Power of Seamless Webinars with Pageinar.
Customizing Your Chat and Engagement Tools
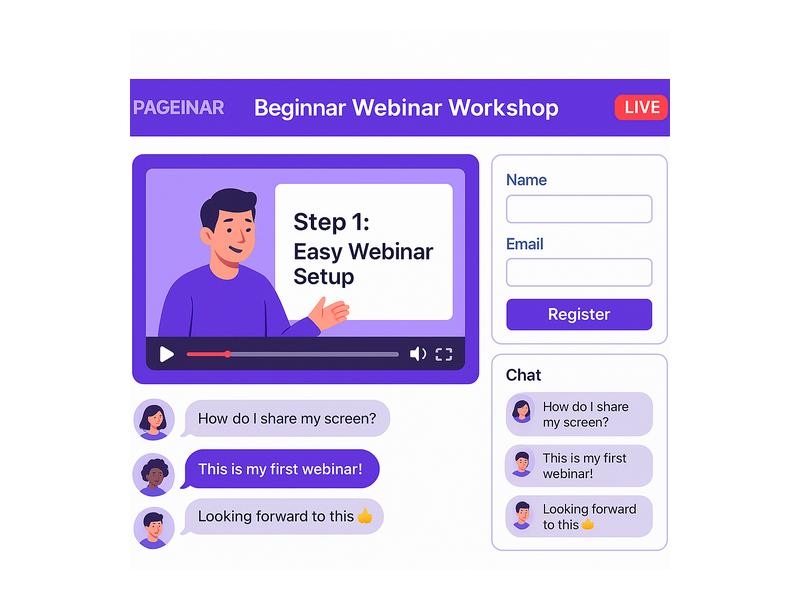
One of the most underrated features in any easy webinar setup for beginners is built-in audience chat. Pageinar includes a full RumbleTalk group chat panel on every broadcast page by default. Therefore, you get professional real-time engagement tools without any extra configuration or third-party accounts. Additionally, you can customize the chat theme from the Chat Settings section in the gear menu. For example, choose from multiple visual themes to match your brand colors and make the experience feel cohesive.
Furthermore, you can set an offline message that appears in the chat when you are not broadcasting. This keeps your page active and informative even between sessions. Moreover, the chat admin controls let you moderate messages, mute disruptive attendees, and highlight important comments for the audience to see. Together, these tools help beginners run smooth, professional events from the very first session.
Using Password Protection in Your Easy Webinar Setup
If you want to restrict access to your webinar, Pageinar makes this simple and straightforward. In the Broadcast Settings section of the gear menu, click the Page Password Protect button. Then enter a password that only your registered attendees will receive via email. As a result, only invited viewers can access your live session. This feature is especially useful for paid webinars, private coaching calls, and internal corporate training sessions. Additionally, password protection adds a layer of exclusivity to your easy webinar setup for beginners that audiences tend to appreciate.
Managing Your Registered Attendees and Lead Data
After attendees sign up through your registration page, Pageinar stores all their details automatically in one organized list. Open the Settings panel and click Registered List to view every lead you have collected. In fact, you can search the list by name, company, or email address in seconds. Furthermore, the list is fully exportable so you can import it into your email marketing platform or CRM. Therefore, your easy webinar setup for beginners also doubles as a powerful lead generation and list-building tool.
For example, a marketing coach who used Pageinar for the very first time collected over 200 leads before a single broadcast began. Additionally, the export feature made it easy to follow up with every attendee immediately after the event. In short, Pageinar turns a simple beginner webinar into a complete lead-capture funnel without any additional tools.
Reviewing Your Broadcast Recordings After the Event
Every webinar you host on Pageinar is recorded automatically in the background. After your session ends, open Settings and click Broadcast Recordings to access the full archive. You will see a list showing each recording, its duration, and its date. Furthermore, each recording is exportable so you can share it with attendees who missed the live session, repurpose it as on-demand content, or review it to improve your presentation skills. This is a huge advantage for beginners who want to grow and refine their delivery over time.
Tips to Make Your Easy Webinar Setup for Beginners Even Smoother
Even the easiest setup benefits from a few smart best practices. First, always do a brief test broadcast before your real event to check your camera, microphone, and connection quality. Second, prepare your slides or talking points in advance so you stay on topic and on schedule. Third, promote your registration page at least one week before the event to maximize sign-ups and build anticipation. Finally, engage actively with chat messages during your broadcast to keep the audience involved and feeling valued.
Additionally, consider adding social media links in the Broadcast Settings panel. For example, connect your Instagram, YouTube, or Twitter accounts so attendees can follow you and stay connected after the event ends. Moreover, use a clear and specific webinar title on your landing page so visitors immediately understand the value of attending. Ideally, your title should mirror the search terms your target audience actually uses when looking for solutions you provide.
Furthermore, keep your webinar focused and time-bound whenever possible. A 45-minute to 60-minute session is ideal for most beginners. Shorter sessions are easier to prepare, more engaging to deliver, and easier for busy attendees to commit to in their calendars. Together, these practical tips will help you build confidence quickly and grow a loyal webinar audience session by session.
Why Pageinar Is the Top Choice for Easy Webinar Setup for Beginners
Pageinar stands out because it removes every technical barrier that normally stops beginners from hosting their first webinar. There is no code to install, no plugin for attendees to download, and no complex dashboard to learn. Instead, everything lives on a single hosted landing page that you share via a URL. Additionally, features like built-in chat, registration forms, lead collection, password protection, and automatic recordings are all included out of the box. Therefore, easy webinar setup for beginners simply does not get more accessible than this.
Moreover, Pageinar is trusted by major global brands including Nasdaq, Wix, HP, and Sony Music. This gives beginners the confidence that the platform is reliable, scalable, and ready for professional-level events. In fact, if the platform handles enterprise-level broadcasts with ease, it will certainly power your first beginner webinar without any hiccups. For full details on features and pricing, visit the Pageinar webinar hosting homepage today.
Start Your Easy Webinar Setup for Beginners Right Now
You now have everything you need to host a successful, professional webinar as a complete beginner. From signing in with Google, to customizing your page, to going live and collecting leads, Pageinar makes easy webinar setup for beginners the standard, not the exception. Therefore, there is no reason to delay. Visit pageinar.com now, sign in with your Google account, and launch your first live event today. Your audience is ready and waiting for what only you can deliver.