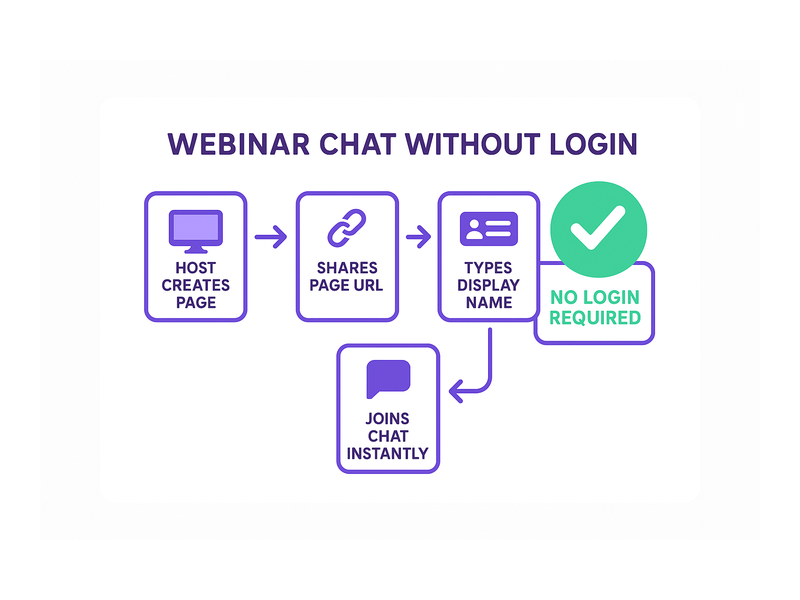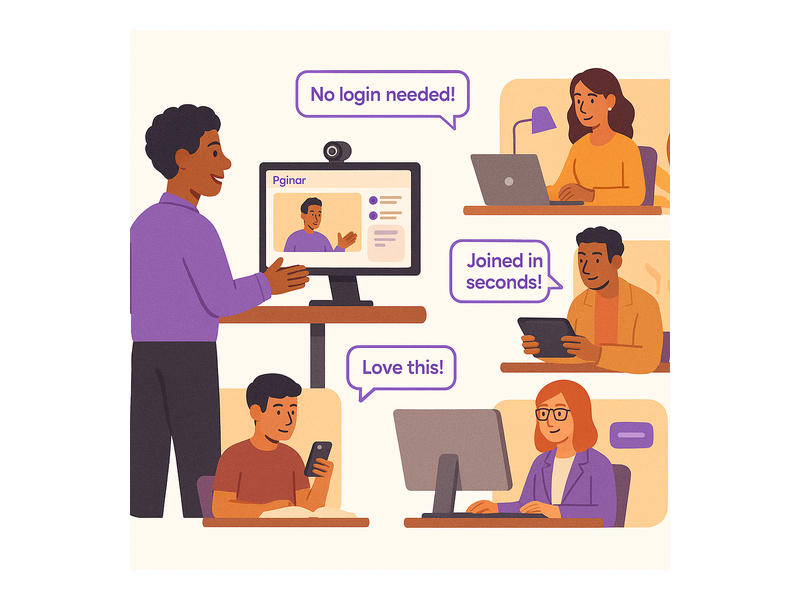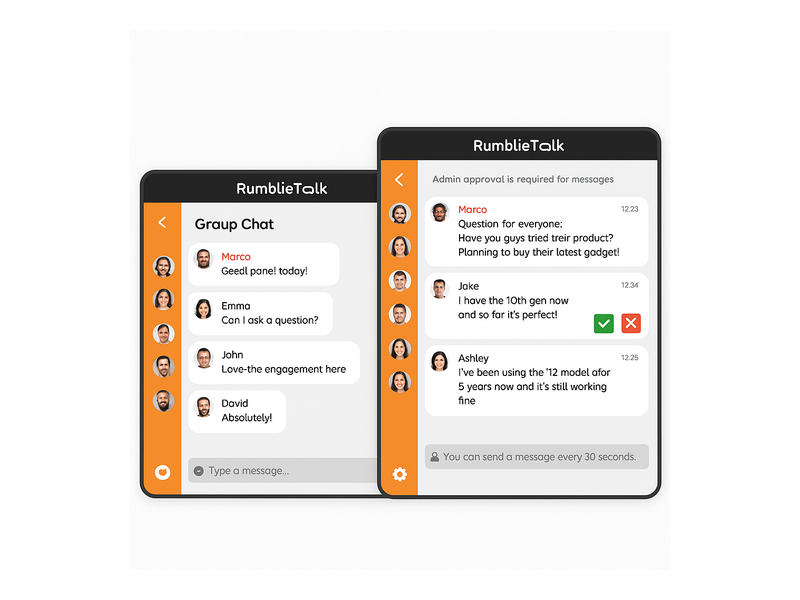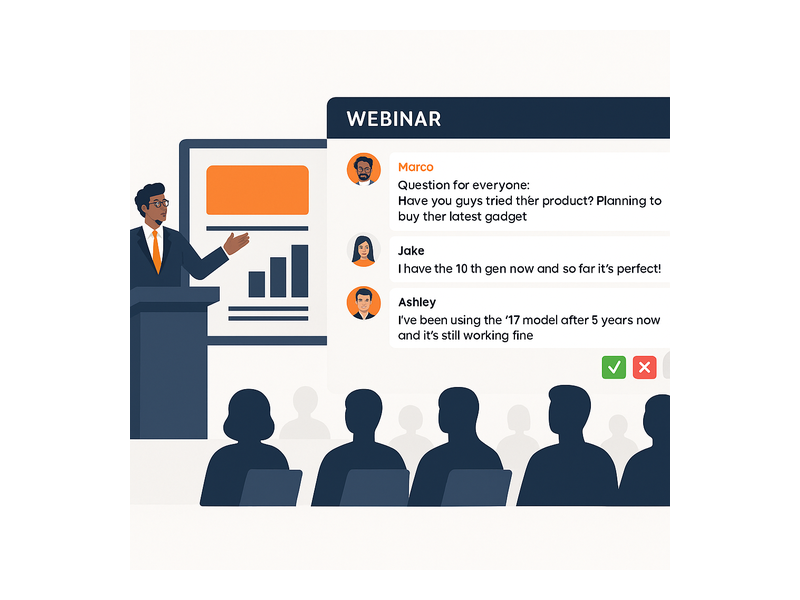
Webinar Signup Page with Live Stream: The Complete Guide

A webinar signup page with live stream is the single most powerful tool you have for converting online interest into live event attendance. However, most event hosts still rely on disconnected tools: one platform for registration, another for the live broadcast, and a third for chat. In fact, this fragmentation causes drop-off at every handoff point. Additionally, attendees who struggle to find the right link on event day simply do not show up. Pageinar solves this by giving you a complete webinar platform where your registration form and live broadcast share one permanent, shareable URL.
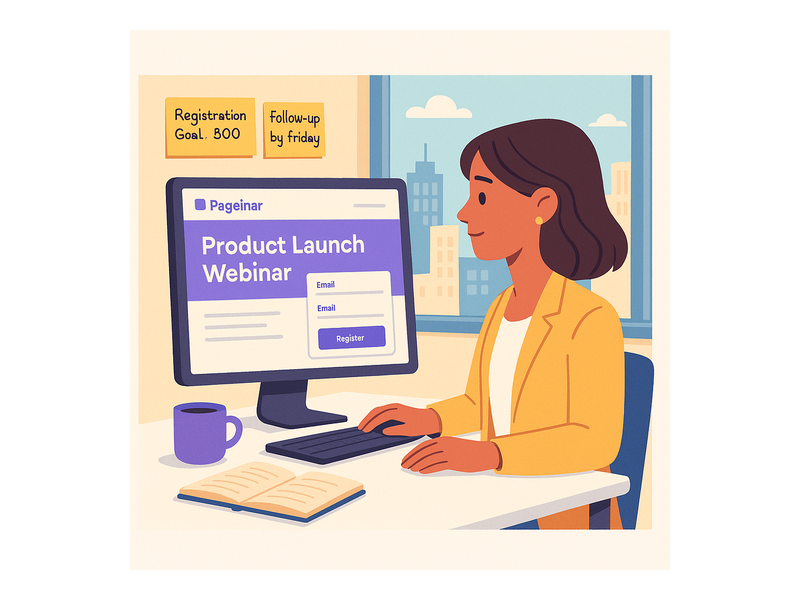
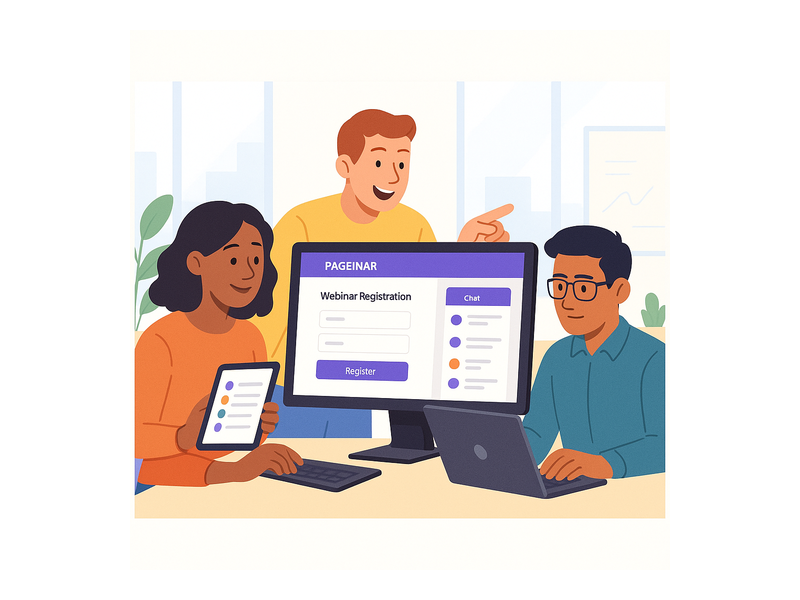
Pageinar webinar landing page illustration 1

Why a Webinar Signup Page with Live Stream Changes Everything

Traditional webinar tools force attendees through multiple steps. First, they fill out a registration form on one site. Then, they receive a calendar invite linking to a different platform. Finally, they are asked to download an app or install a browser extension just to participate. Moreover, each extra step introduces a reason to drop off before the event even starts. Therefore, consolidating your webinar signup page with live stream onto a single hosted URL removes friction at every stage of the attendee journey.

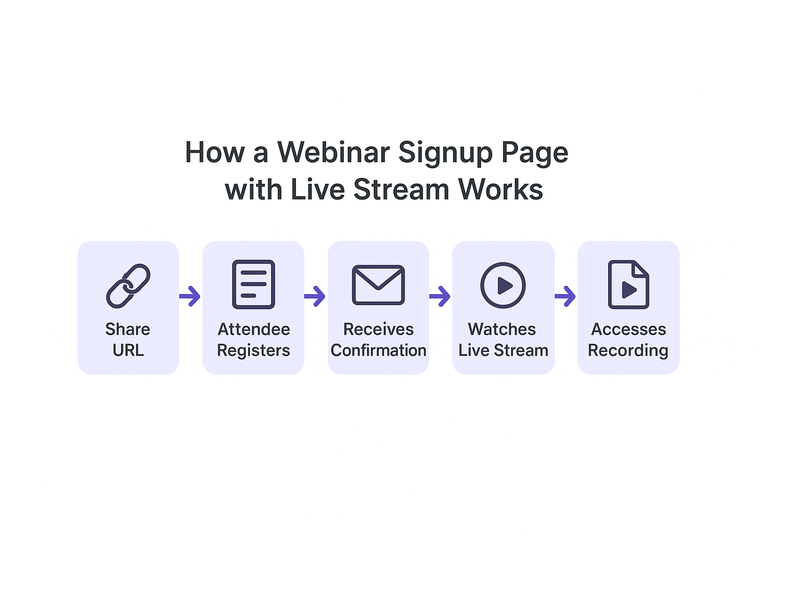
For example, Pageinar operates entirely on one URL per account. Attendees visit the page before the event and register directly. Then, on event day, they return to the exact same URL and the page has switched to Broadcasting Mode. Furthermore, no download or plugin is required on the viewer side. As a result, your show-up rate improves because attendees are never confused about where to go on event day.

According to Wikipedia’s overview of webinars, growing adoption of online events is closely tied to reductions in technical barriers for viewers. However, setup complexity on the host side remains a challenge for many organizers. Therefore, a no-code, no-plugin webinar signup page with live stream like Pageinar directly addresses that challenge for hosts of all experience levels.

What Makes a High-Converting Webinar Signup Page with Live Stream

Not all registration pages convert equally. Therefore, understanding the key components of a strong webinar signup page with live stream helps you build one that drives real results and maximizes your audience size.

A Clear, Benefit-Driven Event Title

First, your event title must immediately communicate what attendees will gain. For example, instead of a vague name like ‘Monthly Update,’ use a title such as ‘Three Strategies to Double Your Lead Volume This Quarter.’ In other words, the title should sell the outcome, not just describe the session topic.

A Minimal Registration Form

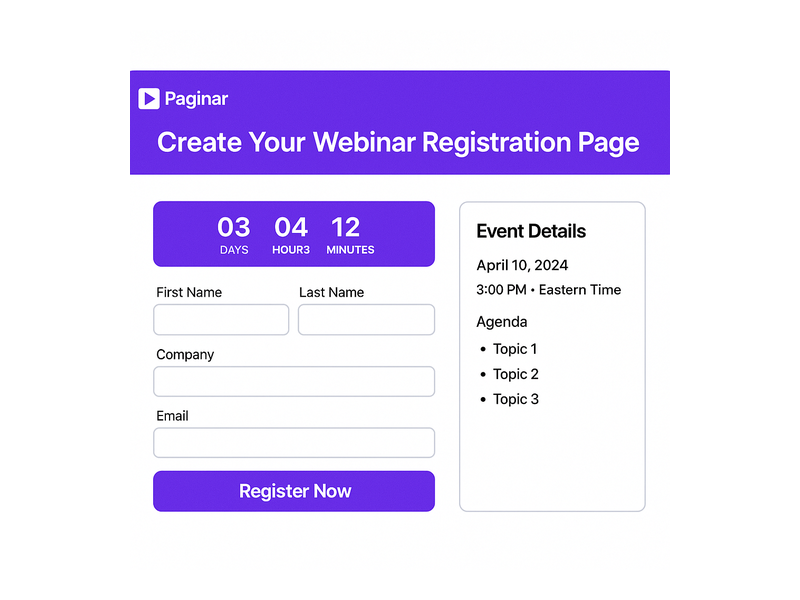
Second, every extra field on your registration form reduces the completion rate. Moreover, asking for information you do not actually need signals a lack of respect for attendees’ time. Pageinar’s Registration Settings let you toggle individual fields on or off: First Name, Last Name, Company, and custom fields. Therefore, you can match the form length precisely to your audience type, whether B2B or consumer.

A Countdown Timer to Drive Urgency

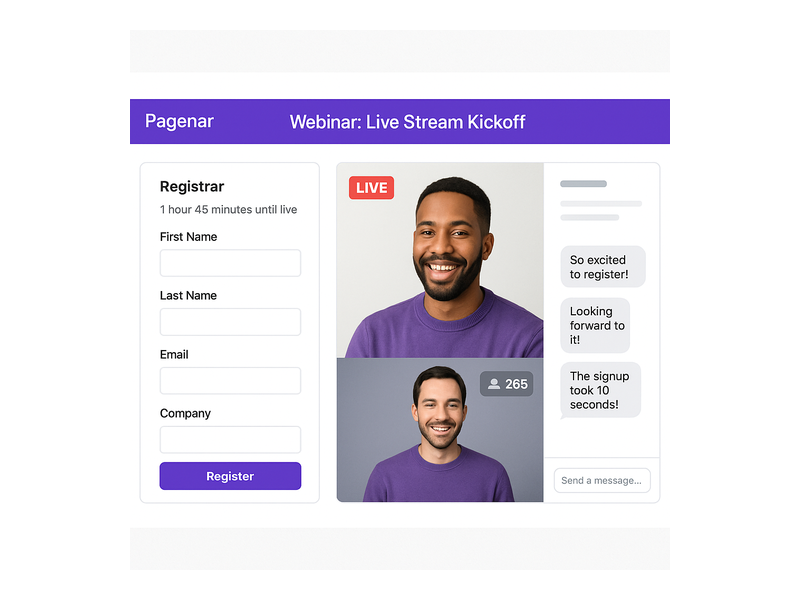
Third, a visible countdown timer significantly reduces procrastination among potential registrants. In fact, research consistently shows that urgency is one of the strongest conversion triggers in event marketing. Pageinar includes a built-in show-timer toggle inside Registration Settings, so attendees see exactly how long remains until your event goes live.

Social Proof and Brand Credibility

Furthermore, linking your social media profiles directly from the event page builds trust before registration. Pageinar’s Broadcast Settings let you add links to Facebook, Instagram, Twitter, YouTube, and Twitch. As a result, first-time visitors can verify your presence and authority before they decide to register on your webinar signup page with live stream.
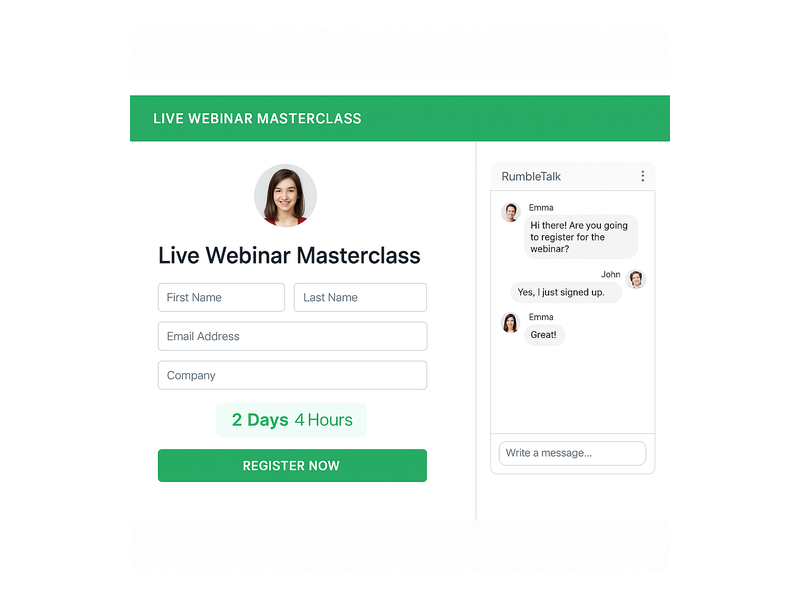
Pageinar webinar landing page illustration 2

How to Set Up a Webinar Signup Page with Live Stream on Pageinar

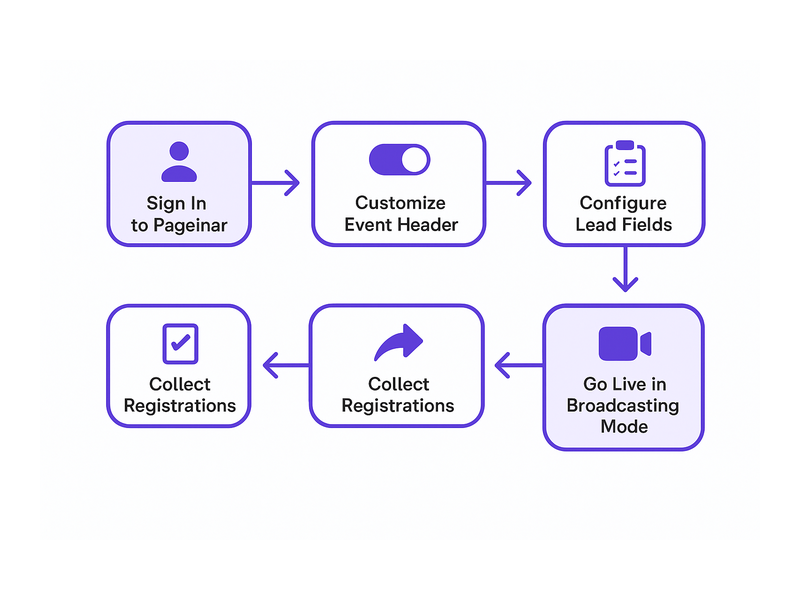
Setting up a webinar signup page with live stream on Pageinar takes only a few minutes. Additionally, the entire configuration happens inside a single, code-free dashboard. Here is a complete step-by-step walkthrough for new hosts.

Step 1: Sign In and Access Your Broadcast Page

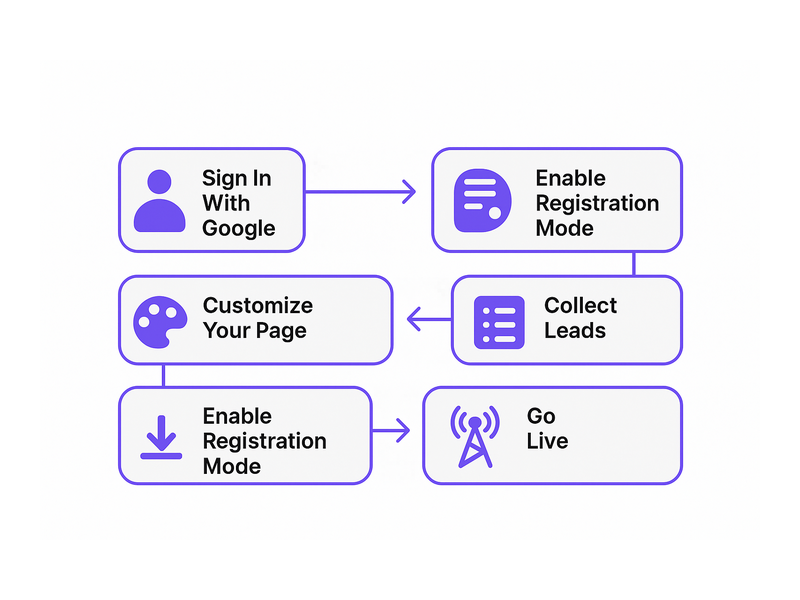
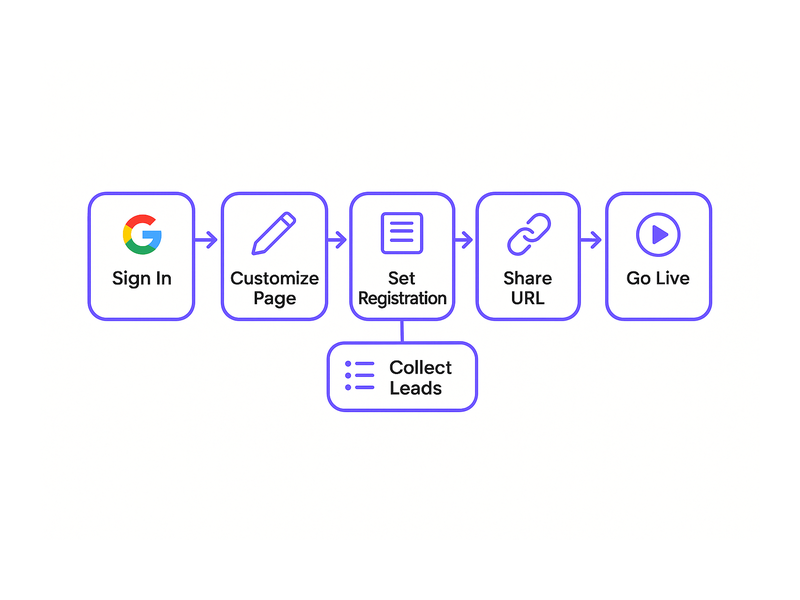
First, visit pageinar.com and sign in using your Google account. After login, you land directly on your main broadcast landing page. This page is already your webinar signup page with live stream. You do not need to create anything from scratch because Pageinar provides the page immediately upon sign-in.

Step 2: Customize Your Registration Settings

Second, open the Settings panel by clicking the gear icon on your page. Then, navigate to Registration Settings. Here, you can select a registration page template, set a background color, write a custom welcome message, and configure the event date and time. Moreover, you can upload a header image or video and enable the countdown timer. To learn more about capturing attendee details effectively, read our guide on how to collect leads before the broadcasting event.

Step 3: Switch to Registration Mode

Third, toggle the page to Registration Mode using the switch in the top-right corner of your dashboard. In this mode, all visitors who land on your URL see the registration form rather than the broadcast area. Therefore, every link you share before the event directs traffic to a clean, focused signup experience with no distractions.

Step 4: Promote Your URL Across All Channels

Fourth, share your single Pageinar URL across all your marketing channels: email, social media, LinkedIn, and your website. Ideally, you begin promotion at least one week before the event. Furthermore, because your webinar signup page with live stream is a permanent URL, every promotional effort continues to point to the correct destination even if you reschedule the event.

Step 5: Switch to Broadcasting Mode and Go Live

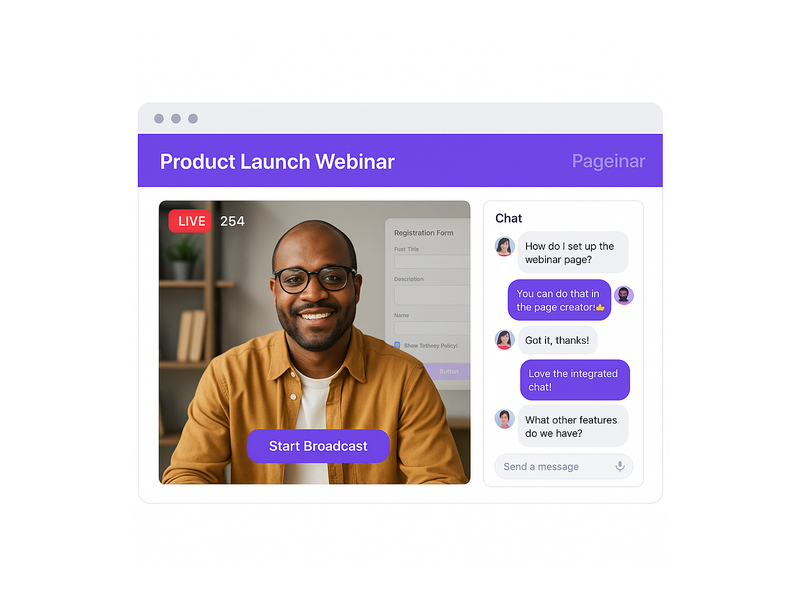
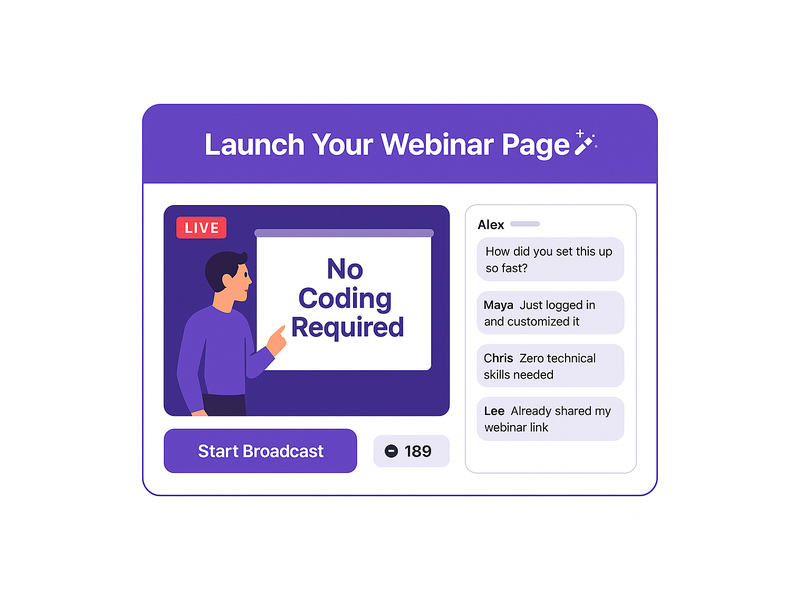
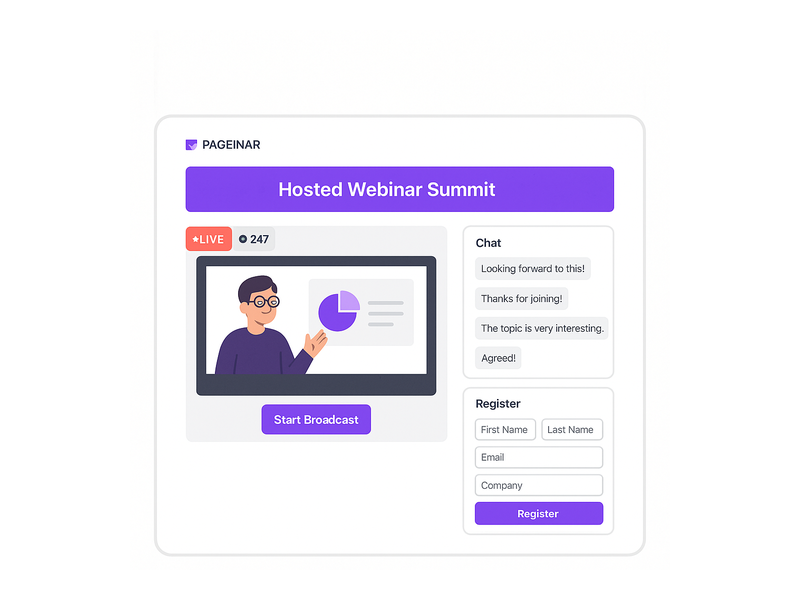
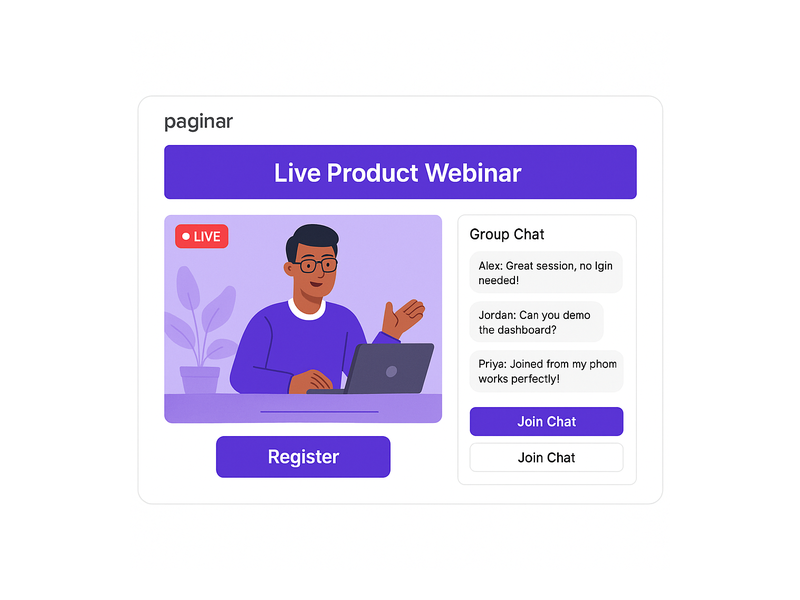
Finally, when your event is about to begin, toggle the page back to Broadcasting Mode. As a result, visitors now see the live broadcast area with the Start Broadcast button and the integrated RumbleTalk group chat panel. Click Start Broadcast to go live. Pageinar automatically displays a red LIVE badge and a live viewer count, creating instant social proof for anyone who joins mid-session.

Optimizing Your Webinar Signup Page for Higher Registration Rates

Building your webinar signup page with live stream is only the first step. However, optimizing it for conversions requires ongoing attention to messaging, timing, and promotional strategy across all your channels.

Use Password Protection for Exclusive Events

Alternatively, for paid events or private corporate sessions, Pageinar lets you add password protection from the Broadcast Settings panel. Therefore, only invitees with the correct password can access the live stream, even if the URL is shared publicly. This makes your webinar signup page with live stream ideal for premium or members-only content as well.

Export and Follow Up with Registered Attendees

Moreover, Pageinar collects registration data including Name, Company, Email, and Phone for every attendee who completes the form. You can view and export this list from the Registered List section of the Settings panel. As a result, you can import the data into your email marketing tool and send timed reminder messages at 24 hours, one hour, and ten minutes before the event starts.

Use a Header Video for Higher Engagement

In addition, Pageinar allows you to upload a short video as the header of your registration page instead of a static image. For example, a 30-second highlight reel from a previous session gives potential registrants a compelling preview of your content. Therefore, the registration page becomes a persuasive sales asset rather than just a data-collection form.

Live Broadcast Best Practices for Your Webinar Signup Page with Live Stream

Once your webinar signup page with live stream switches to Broadcasting Mode, the live experience itself determines whether attendees stay engaged for the full session. Therefore, following proven broadcast practices makes a significant difference in audience retention and satisfaction.

Leverage the Integrated Chat Panel Fully

First, the RumbleTalk group chat integrated into every Pageinar page is a full-featured engagement tool, not just a passive comment box. In fact, it supports moderation controls, multiple visual themes, admin assignment, and viewer-and-speaker display. Furthermore, designating a chat admin to manage questions during the broadcast keeps the conversation focused and professional throughout the session.

Choose a Chat Theme That Reflects Your Brand

Second, Pageinar’s Chat Settings offer multiple visual chat themes you can switch to match your brand style. Moreover, you can toggle the visibility of viewer and speaker counts in the panel. As a result, the chat interface feels like a designed part of your event rather than an afterthought bolted on at the last minute.

Record Every Session for On-Demand Repurposing

Third, Pageinar automatically records every live broadcast. Therefore, you can access your recordings from the Broadcast Recordings section of the Settings panel at any time after the event ends. Each recording entry shows the session duration and export date. Additionally, repurposing recordings as on-demand content extends the value of every live session long after the original broadcast concludes.
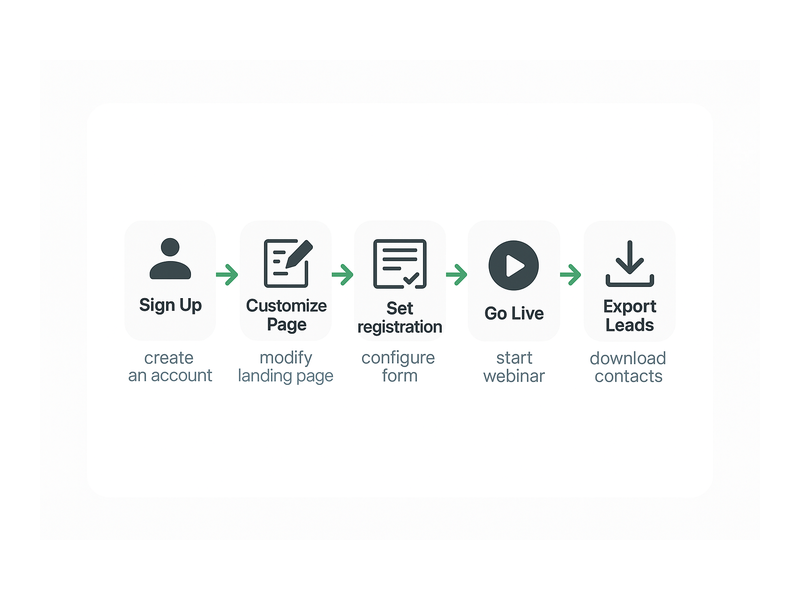
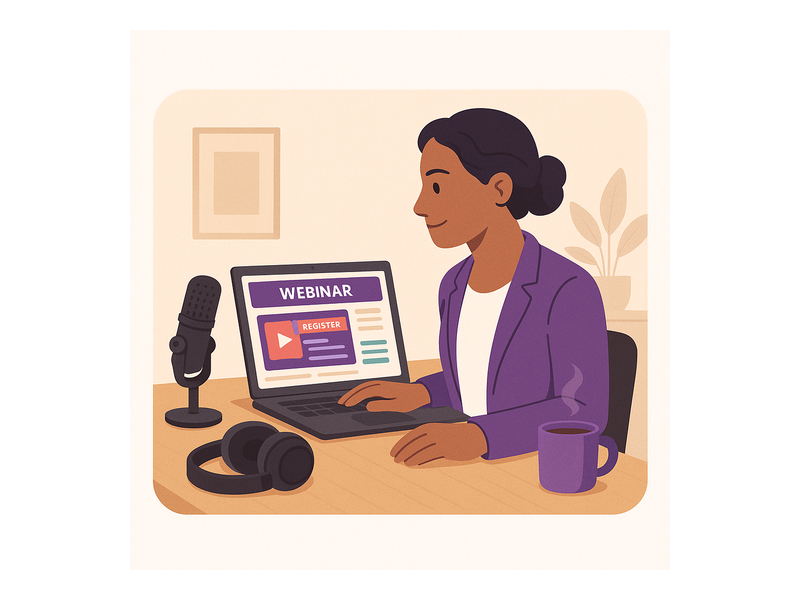
Pageinar webinar landing page illustration 3

Real-World Use Cases for a Webinar Signup Page with Live Stream

A webinar signup page with live stream serves a wide range of business goals. In fact, the flexibility of Pageinar makes it suitable across industries, team sizes, and event types.

Product Launch Events

For example, SaaS companies use a webinar signup page with live stream to debut new features to their existing customer base. Additionally, the integrated chat panel lets product teams collect real-time reactions and questions during the live demo. As a result, the launch becomes a two-way conversation rather than a one-directional announcement broadcast at a passive audience.

Lead Generation Webinars

Furthermore, marketing teams run demand-generation webinars where the registration form captures company name, job title, and custom qualification fields. Ideally, the field labels match the column headers in the sales team’s CRM so leads can be imported directly after export from Pageinar. In other words, the entire pipeline from webinar registration to CRM entry requires zero manual reformatting.

Internal Training and Onboarding

In addition, HR and enablement teams use a webinar signup page with live stream for employee onboarding sessions. Moreover, enabling password protection keeps each session exclusive to invited staff. Therefore, the page functions as a secure internal broadcast channel without requiring enterprise video conferencing software or any IT involvement.

Community Q and A Sessions

Together, content creators and community managers use Pageinar to host recurring Q and A sessions with their audiences. In short, the permanent URL becomes a familiar destination that subscribers bookmark and return to regularly. Better still, the integrated chat panel keeps the community engaged between live events, building a habit loop around the content.

Why Pageinar Is the Right Choice for Your Webinar Signup Page with Live Stream

Pageinar is trusted by organizations including Nasdaq, Wix, HP, and Sony Music. However, the platform serves solo creators and small businesses equally well. In fact, the free plan provides a fully functional webinar signup page with live stream so you can experience everything before upgrading. Furthermore, Pageinar requires no plugin or app installation on the viewer side. Therefore, your webinar signup page with live stream works on any device with a modern browser, and you never lose attendance to technical setup issues on event day.

Additionally, the platform is built around radical simplicity. In short, registration, live streaming, chat, lead collection, and recordings all operate from one hosted URL. No stitching together multiple tools. No complex integrations. No maintenance overhead between events.

Subscription Plans Designed to Scale

Moreover, Pageinar offers free and paid subscription plans. The Subscription Details section of your Settings panel shows your current plan type, attendee limit, and remaining broadcast duration. Ideally, you review these limits before a large event and upgrade if needed. Billing runs through PayPal, and all invoices are searchable by date and transaction ID from the Invoice section of Settings.

Get Started with Your Webinar Signup Page with Live Stream Today

Building a professional webinar signup page with live stream is now more straightforward than ever. First, visit pageinar.com and sign in with your Google account. Second, configure your Registration Settings, add your event details, and share the URL with your audience. Third, switch to Broadcasting Mode when your event is ready, click Start Broadcast, and go live directly to the attendees who signed up on the same page.

For deeper context on the platform vision, read our earlier post: Unlock the Power of Seamless Webinars with Pageinar: Welcome to a New Era of Online Engagement!

Therefore, stop sending attendees through a confusing maze of disconnected tools. Instead, give them one URL that handles everything from first registration to final recording. Better still, start today for free and see the measurable difference a unified webinar signup page with live stream makes for your next online event.
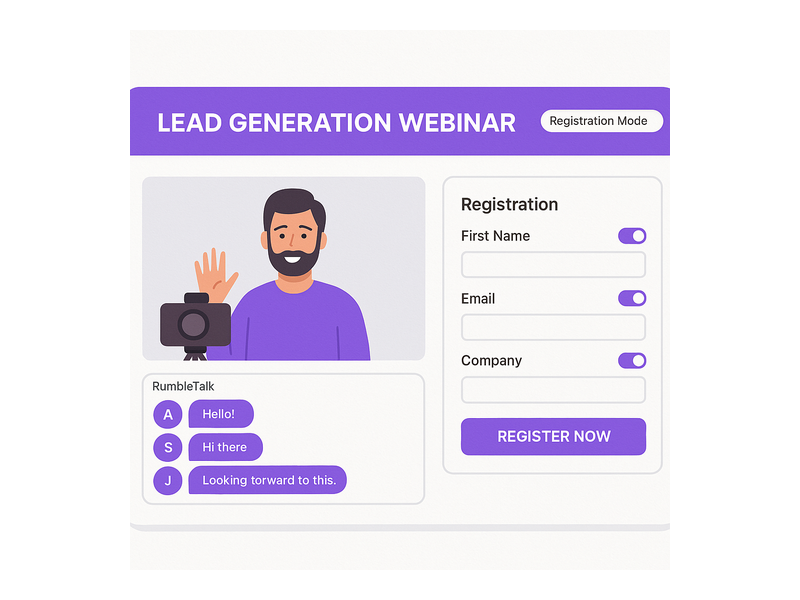
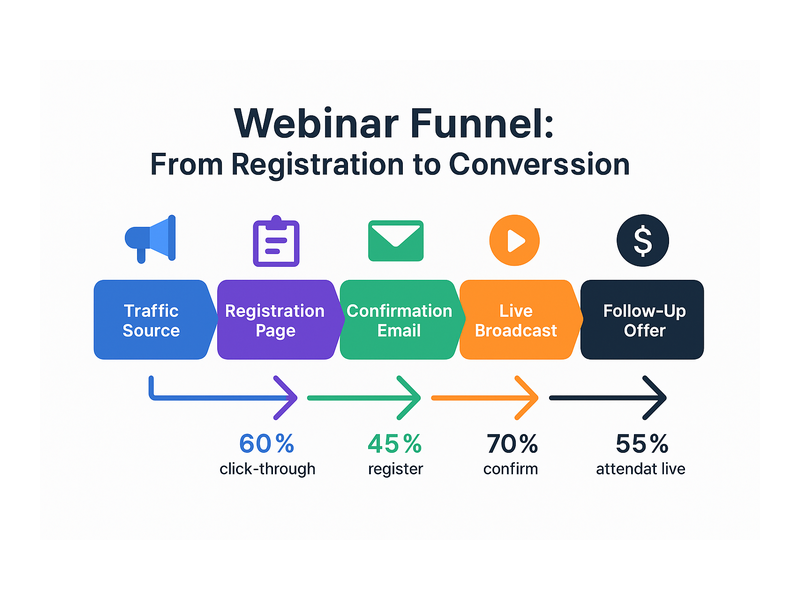
Webinar Funnel Page Builder: Convert More Attendees

A webinar funnel page builder is the most powerful tool you can use to turn live broadcast attendees into paying customers. In fact, every successful webinar depends on a well-designed funnel that captures leads, builds excitement, and guides prospects toward a clear purchase decision. With Pageinar, you get a complete webinar funnel page builder solution in one hosted platform, with no code required and no plugins for your attendees to install.

Pageinar webinar landing page illustration 1

What Is a Webinar Funnel Page Builder?

A webinar funnel page builder is a tool that lets you design and optimize the pages guiding prospects through your entire webinar journey. However, most businesses stitch together separate registration tools, landing page editors, and streaming platforms. This fragmented approach creates a poor experience for attendees and makes tracking results much harder than it needs to be.

In contrast, a unified webinar funnel page builder handles every funnel stage in one place. Additionally, it simplifies your technical stack, reduces setup time, and delivers a seamless attendee experience from registration to live broadcast. According to Wikipedia’s overview of webinars, the format continues to grow as businesses adopt it for training, marketing, and sales. Therefore, having the right webinar funnel page builder in place is now essential for any organization running online events.

The Three Stages of a Webinar Funnel

Every effective webinar funnel supports three core stages. First, you attract prospects with targeted promotion and drive them to a registration page. Second, visitors complete a lead capture form and confirm their spot. Third, registered attendees join the live broadcast, engage with your content, and receive your follow-up offer.

Moreover, each stage requires a distinct page design and a specific messaging approach. Your registration page must communicate urgency and clear value. Your broadcast page must create an engaging, professional atmosphere that keeps attendees watching and participating. Together, these elements form the complete funnel that transforms strangers into loyal customers.

How Pageinar Works as a Webinar Funnel Page Builder

Pageinar takes a uniquely efficient approach to webinar funnel design. Instead of building separate pages for registration and broadcasting, Pageinar gives you a single hosted landing page that handles both functions. This dual-mode system dramatically simplifies your workflow and improves the attendee experience from start to finish.

Here is how the two modes work together to support your funnel:

  • Registration Mode: Your page displays a customizable registration form with your event details, lead capture fields, and an optional countdown timer. Visitors register, and Pageinar stores their information automatically in your Registered List.
  • Broadcasting Mode: When your event starts, the same URL becomes your live broadcast studio. Attendees see your video stream, the integrated RumbleTalk group chat, and your branded page design, all without installing anything on their device.

Furthermore, switching between modes is instant. You toggle the mode from the top-right corner of your Pageinar main page. As a result, your webinar funnel page builder adapts in real time without redirecting attendees or requiring any technical changes on your end.

For a complete overview of Pageinar as a webinar broadcast platform, visit the homepage and explore all available features for your funnel setup.

Customizing Your Registration Page

Your registration page is the critical entry point of your entire webinar funnel. Pageinar’s Registration Settings give you full control over the design and lead capture experience. Specifically, you can configure the following elements to match your brand and event goals:

  • Registration page template and background color
  • Welcome message and event description text
  • Date, time, and optional countdown timer display
  • Header image or video for visual impact and credibility
  • Lead fields: First Name, Last Name, Company, Email, Phone, and custom fields

Additionally, each lead field is individually toggleable. This lets you collect exactly the data your sales team needs without overwhelming potential registrants with a long form. To learn how to set up lead collection before your broadcast, visit the Pageinar Knowledge Base for step-by-step guidance on configuring your lead capture form.

Pageinar webinar landing page illustration 2

Optimizing Your Webinar Funnel Page Builder for Higher Conversions

Building a webinar funnel page builder setup is only the beginning of your optimization work. In addition, you must continuously refine each element to maximize your registration rate and attendee engagement. Therefore, let us walk through the key strategies that top webinar marketers use to get better results from every event they run.

Writing a High-Converting Registration Headline

Your headline is the first thing visitors see when they land on your webinar registration page. Consequently, it must communicate the core benefit of attending in ten words or fewer. For example, instead of ‘Join Our Webinar About Lead Generation,’ write ‘Generate 50 Qualified Leads in One 60-Minute Session.’

Moreover, include a specific outcome, a clear timeframe, and a compelling promise in every headline you write. This formula consistently outperforms vague alternatives in A/B tests across industries. As a result, you can see significantly higher registration rates without increasing your advertising spend or overall traffic volume.

Adding Video to Your Webinar Funnel Page

A short welcome video from the host increases registration rates dramatically on any webinar funnel page. In fact, pages with embedded video convert up to 80% better than text-only registration pages, according to multiple marketing studies. Pageinar lets you add a header video directly to your registration page, giving you an easy way to introduce yourself and build genuine excitement for the event.

Ideally, your welcome video should run between 60 and 90 seconds. Cover who you are, what attendees will learn, and why they should attend live rather than catch a replay later. Keep your tone warm and conversational. This personal approach makes your webinar registration page stand out from generic forms and builds trust before attendees have even signed up.

Using a Countdown Timer to Drive Urgency

Scarcity and urgency are among the most powerful conversion triggers available to any marketer. A countdown timer on your registration page shows exactly how much time remains before the event starts. Pageinar includes a built-in timer toggle in your Registration Settings, making it simple to add this urgency element to your webinar funnel setup.

However, only use the timer when your event date is genuinely fixed and confirmed. Fake countdowns erode trust and damage your brand reputation over time with repeat visitors. When used authentically, a countdown timer can increase registration conversions by 30% or more with no additional effort required from your team.

Balancing Lead Form Fields for Maximum Registrations

Each additional field in your registration form reduces overall conversion rates slightly. Therefore, balance your need for data against the friction you create for potential registrants who visit your page. For most webinar funnel page builder setups, First Name and Email are sufficient for initial lead capture and event confirmation delivery.

For B2B webinars specifically, adding Company and Job Title fields is often worth the additional friction at registration. This data helps your sales team qualify leads before they reach out for a follow-up conversation. Additionally, Pageinar stores all registrant data in your Registered List, which you can search, filter, and export at any time directly from your Settings panel.

Live Broadcasting: Where Your Webinar Funnel Page Delivers Results

Once your event goes live, your webinar funnel page builder experience shifts into Broadcasting Mode. This is where all your lead generation and promotion work pays off in real time. Registered attendees join from the same URL with no downloads or app installations required on their end.

Pageinar’s live broadcast page includes three key areas that work together to create a compelling attendee experience:

  • Live video area: Your broadcast streams directly on the page with a prominent LIVE badge and a real-time viewer count display that builds social proof as more people join.
  • RumbleTalk group chat: Attendees ask questions, share reactions, and engage with each other in real time. You control moderation, chat themes, and admin settings from the Chat Settings panel in your dashboard.
  • Brand elements: Your page header, description, and social links stay visible throughout the broadcast, keeping your brand prominent for every viewer watching your event.

Furthermore, you can password-protect your broadcast page so only registered attendees can access the live session. This feature, available in Broadcast Settings, creates a sense of exclusivity that makes your event feel more valuable and premium to those who signed up in advance.

Pageinar webinar landing page illustration 3

Engaging Your Audience During the Broadcast

Active audience engagement is the defining difference between a forgettable webinar and one that generates real, measurable sales. Therefore, use Pageinar’s group chat to answer live questions, facilitate informal discussions, and build a sense of community among your attendees. In fact, webinars with active chat sessions consistently produce higher post-event conversion rates compared to passive broadcast-only presentations.

Additionally, moderate your chat proactively to keep the conversation focused on your topic. Pageinar gives chat admins full moderation controls, including the ability to remove disruptive participants and pin important messages for all viewers to see. This keeps your broadcast professional and on-brand from the first minute to the last.

Using Recordings for Post-Funnel Nurturing

Every broadcast you run on Pageinar saves automatically to your Broadcast Recordings list inside your Settings panel. Moreover, you can export these recordings and use them as on-demand content to extend your webinar funnel well beyond the live event date. For example, share the recording link in your follow-up email to re-engage attendees who dropped off the session early.

In addition, recordings give you valuable insight into your content performance over time. Review the chat log to identify which questions came up most often during the broadcast. Use those insights to refine your next webinar funnel page builder setup and make each subsequent event more effective and better targeted than the last one.

Webinar Funnel Page Builder Best Practices for B2B Teams

B2B webinar funnels require a more targeted and deliberate approach than consumer-focused events. Specifically, your audience actively evaluates you as a potential partner or vendor during every touchpoint in the funnel. Therefore, every element of your webinar funnel page builder setup must project expertise, credibility, and professionalism from the registration page through to the post-event follow-up sequence.

Focus Your Webinar on One Specific Pain Point

Generic webinar topics attract generic, low-converting audiences who are unlikely to become paying customers. Instead, position your webinar around one specific, pressing pain point that your ideal customer faces right now in their business. For example, replace ‘How to Improve Your Marketing’ with ‘How to Cut Your Cost Per Lead in Half Before Q3 Ends.’

Moreover, use your registration page description to acknowledge the pain point directly before presenting your webinar as the practical solution. This empathy-first approach increases registration rates and attracts prospects who are genuinely ready to act on what you teach. As a result, your post-webinar conversion rates improve without any changes to your core product offer.

Follow Up Within One Hour After Your Event Ends

The post-webinar follow-up email is one of the most critical components of any effective webinar funnel. Send your first follow-up message within one hour of the broadcast ending while attendee memory and motivation are still fresh. Include a warm thank-you message, a link to the event recording, and a clear call to action for your next offer or consultation booking.

In other words, capitalize on attendee momentum before it naturally fades in the hours after your event. Registrants are most engaged and receptive in the window immediately following a live session they attended. Therefore, a fast and personalized follow-up can convert a significant portion of attendees into paying customers or qualified sales conversations for your team.

Why Pageinar Is the Ideal Webinar Funnel Page Builder

Many webinar platform tools require multiple subscriptions, complicated third-party integrations, and significant technical setup work before you can go live. Pageinar eliminates all of that complexity from your workflow. You log in with your Google account, customize your broadcast page, and launch your event in minutes with nothing required on the attendee side.

Additionally, Pageinar has earned the trust of leading organizations including Nasdaq, Wix, HP, and Sony Music. This track record reflects the platform’s reliability and enterprise-grade capabilities for large-scale events. Whether you run a small internal team demo or a major external broadcast, Pageinar scales to meet your needs without requiring additional technical resources or developer support.

For a deeper look at what makes Pageinar a powerful webinar funnel page builder solution for teams of every size, read our post Unlock the Power of Seamless Webinars with Pageinar: Welcome to a New Era of Online Engagement!

Start Building Your Webinar Funnel Page Builder Today

Getting started with your webinar funnel page builder on Pageinar takes less than five minutes from your first login to your live registration page. First, visit Pageinar and log in with your Google account. Second, customize your broadcast page with a cover image, avatar, event title, and description that reflects your brand. Third, switch to Registration Mode and configure your lead capture form with the fields your sales team needs. Finally, share your page URL and start driving registrations from your chosen promotion channels.

Moreover, you manage your entire webinar funnel without any technical expertise or third-party integrations to maintain. Pageinar handles hosting, streaming, chat moderation support, and lead storage automatically in the background. As a result, you spend your energy creating great content and building your audience rather than troubleshooting technical issues before your event goes live.

In conclusion, a well-configured webinar funnel page builder transforms your webinar from a one-time content event into a repeatable, scalable revenue engine for your business. With Pageinar, you get every tool you need in a single, easy-to-use hosted platform that requires no plugins, no code, and no prior technical experience. Therefore, start building your webinar funnel today and discover how much easier it is to convert attendees into customers when your registration page, live broadcast, lead capture, and audience engagement all work together seamlessly from one URL.

Ready to launch your first webinar funnel? Get started with Pageinar for free today. No installation required, no technical expertise needed, and no limits on the audience you can reach with the right webinar funnel page builder powering your next live event.

Live Webinar Landing Page Software: Complete Guide

Live webinar landing page software has transformed the way businesses connect with online audiences. Moreover, the best platforms eliminate complex technical setups entirely. Instead of juggling separate tools for hosting, registration, chat, and lead capture, you get one branded page that handles everything. In this guide, you will discover how the Pageinar live webinar landing page platform works. Whether you host your first broadcast or scale an established webinar program, the right live webinar landing page software makes every event seamless and professional.

Pageinar webinar landing page illustration 1

What Is Live Webinar Landing Page Software?

Live webinar landing page software is a platform that combines a branded event page, a live broadcast area, a registration form, and audience chat in one hosted URL. Therefore, you do not need separate tools for each function. Instead, everything a host and an attendee need lives on a single page that you customize and share. According to Wikipedia, webinars have become a core channel for modern education and marketing. As a result, businesses now rely on dedicated live webinar landing page software to host professional events without technical complexity.

Traditional webinar setups require attendees to download apps or install browser plugins. However, modern live webinar landing page software removes that barrier completely. For example, with Pageinar, attendees simply open a shared URL in any browser on any device. No installation, no friction, no drop-off at the door. Furthermore, hosts get a fully editable page where they add a cover image, avatar, event title, and description in minutes. In fact, the entire setup takes less time than writing a single invitation email.

Key Features of the Best Live Webinar Landing Page Software

Not all live webinar landing page software offers the same capabilities. Therefore, knowing which features matter most will help you choose the right platform. Additionally, your priorities will depend on audience size, content format, and lead generation goals. Here are the core capabilities that separate great platforms from basic ones.

Registration Mode and Lead Collection

Registration Mode lets you collect attendee details before the event starts. In fact, the best live webinar landing page software lets you choose which fields to include: First Name, Last Name, Company, Email, Phone, and custom fields. For example, a B2B software company might add a Job Title field to pre-qualify leads. Moreover, you can set a specific event date and time, display a countdown timer, and upload a header image or video to build anticipation. All collected leads go into a searchable, exportable Registered List. To learn more, visit the Pageinar Knowledge Base guide on how to collect leads before the broadcasting event.

Broadcasting Mode and Live Video

Broadcasting Mode is the live event experience itself. Therefore, your landing page switches from a registration form to a full live broadcast area. Viewers see your live video stream, a viewer count badge, and a red LIVE indicator. In addition, the Start Broadcast button makes going live as simple as one click. Furthermore, sessions record automatically, so you can share replay links or export recordings after the event ends. This built-in recording feature saves significant time and adds lasting replay value to every broadcast you run.

Integrated Group Chat

A live chat panel is essential for any engaging webinar experience. However, most platforms force you to embed a third-party chat widget awkwardly. In contrast, Pageinar includes a fully integrated RumbleTalk group chat panel on every landing page. Therefore, attendees can ask questions, share reactions, and engage with each other in real time. Additionally, hosts get full moderation controls: they can pin messages, remove disruptive users, and set a custom offline message. Furthermore, multiple visual chat themes let you match the panel style to your brand aesthetic with just a few clicks.

How to Set Up Your Live Webinar Landing Page

Setting up live webinar landing page software should not require a developer or a dedicated technical team. Therefore, Pageinar makes the process accessible in a few clear steps. First, sign in with your Google account at pageinar.com. Second, you land directly on your broadcast landing page, already built and ready to edit. Third, customize the cover image, avatar, event title, and description to match your brand. Finally, toggle between Registration Mode and Broadcasting Mode using the control in the top-right corner of the page.

Additionally, the gear icon opens the full Settings panel for advanced configuration options. From there, configure Registration Settings by choosing a template, setting the background color, and writing a welcome message. Moreover, select which lead collection fields to show your attendees from the available options. Broadcast Settings let you add a page password for private events. You can also connect social media profiles including Facebook, Instagram, Twitter, YouTube, and Twitch. As a result, your live webinar landing page becomes a complete professional event hub in just a few minutes.

Pageinar webinar landing page illustration 2

Lead Generation with Live Webinar Landing Page Software

Live webinar landing page software is one of the most effective lead generation tools available to marketers today. In fact, webinars consistently produce higher-quality leads than static content like blog posts or downloadable guides. Therefore, every broadcast you run becomes a direct opportunity to grow your database with qualified contacts. For example, a SaaS company hosting a product walkthrough can collect hundreds of verified business emails in a single one-hour session.

Moreover, the registration form on your landing page acts as a natural qualification filter for every attendee. People who fill out a form are already interested in your topic. As a result, your follow-up emails reach a warm, engaged audience rather than a cold purchased list. Additionally, the exported lead list includes Name, Company, Email, Phone, and Date, giving your sales team the context needed for personalized outreach. Together, these features make live webinar landing page software a powerful addition to any demand generation strategy. For more on getting the most from your broadcasts, read our post on Unlock the Power of Seamless Webinars with Pageinar: Welcome to a New Era of Online Engagement!

Customizing Your Live Webinar Landing Page for Maximum Impact

A generic-looking webinar page does not inspire confidence or drive registrations. Therefore, customization is a critical part of any live webinar landing page software. In fact, branded event pages see significantly higher registration rates than plain, unbranded forms. Pageinar gives you full visual control of your page without writing a single line of code, so you can focus entirely on your content and audience.

Cover Images and Branding

First, add a high-quality cover image or set a solid background color that matches your brand palette. Second, upload your avatar or company logo to establish immediate credibility with visitors. Third, write a clear event title and a short description that states the specific value of attending. Additionally, your website URL appears on the page, linking attendees directly to your business. As a result, your live webinar landing page doubles as a brand touchpoint before the event even begins, reinforcing your professionalism from the first impression.

Registration Page Templates

Pageinar includes multiple registration page templates to match different event styles and audience expectations. For example, a product launch event might use a bold, dark-themed template with a video header to build excitement. In contrast, a professional training webinar might use a clean, light template with a simple header image for a formal look. Furthermore, you can customize the background color and welcome message for each event independently. Therefore, you can run multiple events with distinct visual identities from the same account without extra setup.

Chat Themes and Audience Engagement

Chat engagement directly affects how memorable and interactive your webinar feels to attendees. Therefore, choosing the right chat theme matters more than most hosts realize. Pageinar offers multiple visual themes for the RumbleTalk chat panel, from dark professional styles to light conversational layouts. Additionally, you can set a custom offline message that displays in the chat when the broadcast is not yet live. As a result, attendees who arrive early still see a welcoming experience. Furthermore, you can toggle the display of viewers and speakers within the chat panel, giving you precise control over the social dynamics of each event.

Pageinar webinar landing page illustration 3

Who Benefits Most from Live Webinar Landing Page Software?

Live webinar landing page software suits a wide range of industries and use cases. However, some audiences benefit especially from the all-in-one, no-installation approach. For example, B2B marketers use it to run product demos, thought leadership sessions, and industry roundtables. In addition, course creators and independent coaches deliver live training without building a custom website or learning a complex streaming tool. Furthermore, enterprise organizations broadcast product announcements and press events to large, distributed audiences around the world.

Additionally, small businesses and solo entrepreneurs benefit from the free plan, which requires no upfront investment. Therefore, there is no budget barrier to hosting your first live webinar landing page event. Moreover, as your audience grows, upgrading your subscription adds more attendee capacity and broadcast duration. In other words, the platform scales naturally with your business from the very first event you host. Ideally, start with a small internal broadcast, observe what resonates with your audience, and build your webinar program from that foundation.

Security and Privacy for Your Webinar Events

Security is a key concern for any live event platform. Therefore, live webinar landing page software must include meaningful access controls. First, Pageinar lets you add a page password via Broadcast Settings, so only invited attendees can enter your event. Second, the registration form itself qualifies attendees before they join, adding another layer of filtering. Furthermore, all data collected through the registration form is stored securely and visible only to the page owner through the Registered List panel in Settings.

Moreover, Pageinar handles all server infrastructure on its side, so you never worry about capacity or bandwidth spikes. In fact, the platform scales automatically to support your audience size without any action from you. Additionally, attendees access everything through a standard browser URL, so no client-side software introduces security vulnerabilities. Ideally, your live webinar landing page software handles security quietly in the background, freeing you to focus entirely on content and audience engagement during the event.

Comparing Free and Paid Plans

Choosing the right plan for your live webinar landing page software depends on your audience size and event frequency. First, the free plan gives you access to core features: a fully editable landing page, Registration Mode, Broadcasting Mode, and integrated group chat. However, attendee limits and broadcast duration are lower on the free tier. Therefore, the free plan works best for small internal teams, beta product launches, or anyone hosting their very first webinar.

In contrast, paid plans remove these constraints and unlock expanded capabilities. For example, larger attendee caps let you host public webinars for hundreds or thousands of simultaneous viewers. Moreover, extended broadcast duration gives you flexibility for longer training sessions, all-day virtual summits, or multi-speaker panels. Additionally, Subscription Details, billing history, and invoice records are all accessible from the Settings panel, making plan management simple and transparent. In short, upgrading is a quick decision that immediately expands what your live webinar landing page software can do for your organization.

Get Started with Live Webinar Landing Page Software Today

Live webinar landing page software no longer needs to be complicated, expensive, or dependent on a technical team. Therefore, there has never been a better time to launch your first broadcast. With Pageinar, you sign in with Google, customize your landing page, and go live in minutes. No plugins, no downloads, and no coding required on either side of the broadcast. Moreover, every feature you need including registration, live streaming, lead capture, integrated chat, and session recordings is built into one clean hosted page. In other words, Pageinar gives you everything a professional event host needs, delivered through one simple URL you share with your audience.

Additionally, the platform continues to evolve based on real user feedback, so new capabilities arrive regularly. As a result, your live webinar landing page software only gets better over time. In short, there is no simpler way to host a professional online event and capture leads at the same time. Head to pageinar.com today, sign in with Google, and create your first live webinar landing page for free.

Webinar Page Creator Tool: Build Your Broadcast Page Fast

A webinar page creator tool transforms how businesses host online events and connect with their audience. Instead of juggling multiple platforms and complicated technical setups, you get one hosted page that handles everything from registration to live broadcast. Pageinar is a complete webinar page creator tool that lets you design, customize, and launch a branded broadcast page in minutes. No code installation is required on your end. Additionally, your attendees do not need to download any plugins or apps at all. You simply log in with Google, configure your page, and share the URL. Moreover, companies like Nasdaq, Wix, HP, and Sony Music rely on this kind of instant broadcast infrastructure for their online events. This guide walks you through everything you need to know about choosing and using a webinar page creator tool effectively.

Pageinar webinar landing page illustration 1

What Is a Webinar Page Creator Tool?

A webinar page creator tool is software that lets you build and publish a branded landing page for live online events. In short, it replaces the need for a separate website builder, a standalone streaming server, and a third-party registration system all at once. For example, with Pageinar, your entire broadcast infrastructure lives on one hosted URL that you own and control. First, you log in and your main broadcast page is created automatically. Then, you customize the header, avatar, event title, and description to reflect your brand. Finally, you toggle the page between Registration Mode and Broadcasting Mode depending on where you are in the event lifecycle. Furthermore, the page works on any device without requiring viewers to install anything at all. According to research on web conferencing, attendance rates improve significantly when participants can join with a single click and no software downloads. This browser-first approach is exactly what the modern webinar page creator tool delivers.

Why Your Business Needs a Webinar Page Creator Tool

Most businesses still rely on outdated platforms that require attendees to install software before joining a live event. However, a modern webinar page creator tool eliminates this friction entirely. In fact, reducing the number of steps between a viewer and your live stream directly increases attendance rates. Therefore, your audience grows simply by removing the technical barrier at the door. Moreover, a self-contained broadcast page lets you control the complete attendee experience from the first click to the final broadcast minute. You decide what the registration form includes. You decide how the chat panel looks and behaves. You decide exactly when to switch from registration mode to live mode. As a result, your brand stays consistent across every touchpoint without relying on patchwork integrations. Better still, all the lead data collected through your registration page stays organized inside your Pageinar dashboard and is ready for export after each event.

The Problem With Traditional Webinar Software

Traditional webinar platforms typically require attendees to download a desktop app or install a browser plugin before they can view the event. This creates immediate drop-off at the very first step. In addition, older platforms often charge on a per-attendee basis, making live events expensive as your audience grows. Alternatively, some platforms restrict recording duration or limit chat features unless you pay for a higher-tier plan. However, a hosted solution like Pageinar runs entirely in the browser. Therefore, no attendee ever faces a download prompt or a permission warning. Additionally, the subscription model is straightforward and based on your plan, not per-seat pricing. In other words, you can grow your audience freely without worrying about unpredictable billing. Furthermore, all your past broadcast recordings remain available in your dashboard for review and export at any time.

Key Features of a Great Webinar Page Creator Tool

Not all webinar page creator tools are built with the same capabilities. Therefore, knowing which features matter most helps you choose the right platform for your needs. First, look for a point-and-click builder that lets you customize the cover image, avatar, title, and event description without writing a single line of code. Second, confirm that the tool includes a built-in registration form with configurable lead capture fields. Third, verify that the live streaming module works without any viewer-side installation. Moreover, a strong platform includes an integrated chat system for real-time audience engagement throughout the broadcast. Finally, recording support lets you repurpose content after the event ends. Pageinar delivers all of these capabilities within a single hosted page, making setup fast and the experience seamless for both hosts and viewers.

Page Customization Options

When you use Pageinar as your webinar page creator tool, customization options cover every visible element of the broadcast page. For example, you can upload a custom cover image or choose a solid background color for the page header area. Additionally, you can set your avatar, event title, website URL, and a detailed event description that attendees see when they arrive. The main page layout places a large video player area on the right side and an integrated chat panel on the left. In other words, attendees see a professional, fully branded event page the moment they open your URL. Furthermore, the Settings panel provides access to social links for Facebook, Instagram, Twitter, YouTube, and Twitch so you can cross-promote your event without any extra integrations. Therefore, your single broadcast page becomes the complete hub for your entire event.

Registration and Lead Collection

One of the most valuable features of any webinar page creator tool is built-in lead collection. Pageinar includes a Registration Mode that turns your broadcast page into a pre-event sign-up form with no extra tools required. First, toggle the page to Registration Mode from the top-right of your dashboard. Then, in Registration Settings, configure the template, background color, welcome message, and event date and time. Additionally, toggle individual lead fields on or off, including First Name, Last Name, Company, Email, Phone, and any custom fields you define. Therefore, you collect only the information that matters to your specific event or audience. As a result, you build a clean, organized list of registered attendees before the first minute of your broadcast. To learn more about collecting leads before your broadcast event, visit the Pageinar Knowledge Base for detailed step-by-step guides.

Pageinar webinar landing page illustration 2

How to Set Up Your Webinar Page Creator Tool Step by Step

Getting started with Pageinar as your webinar page creator tool takes less than ten minutes. Moreover, no technical skills or prior experience are required. Follow these seven steps to launch your first broadcast page today.

  1. Sign in with Google. Visit pageinar.com and click the Google login button. No password setup is needed. Your main broadcast page is created automatically on first login.
  2. Customize your page header. Click the editable header area and upload a cover image or choose a background color. Set your avatar, event title, website URL, and event description to reflect your brand.
  3. Configure Registration Settings. Open the gear icon and navigate to Registration Settings. Set your event date and time, welcome message, and choose which lead fields to display on the form.
  4. Toggle to Registration Mode. Switch the page to Registration Mode using the top-right toggle. Your page now acts as a pre-event sign-up destination for incoming attendees.
  5. Share your page URL. Copy your unique broadcast page URL and share it via email, social media, or any marketing channel. Attendees visit the link and register directly without any friction.
  6. Go live. When the event starts, toggle to Broadcasting Mode and click Start Broadcast. Your live stream begins and attendees can watch and participate in the chat in real time.
  7. Review your leads. After the event, open the Registered List panel in Settings to view, search, and export all collected attendee data for follow-up campaigns.

Additionally, you can password-protect your broadcast page from the Broadcast Settings panel. Therefore, only invited attendees who have the correct password can access the live stream. This feature works especially well for private corporate training sessions and exclusive product demos where access control matters.

Live Broadcasting With Your Webinar Page Creator Tool

The live broadcasting experience inside a webinar page creator tool must be simple for the host and smooth for every viewer. Pageinar achieves both goals effectively. When you are ready to go live, open your broadcast page, toggle to Broadcasting Mode, and click Start Broadcast. First, the broadcast area displays an OFFLINE status badge by default. Then, once you start the stream, the badge switches to a red LIVE indicator with a visible viewer count displayed in real time. Moreover, viewers do not need to refresh the page to see the live feed appear. Additionally, the integrated chat panel lets attendees send messages, ask questions, and engage throughout the session. As a result, participation levels stay high even during large group broadcasts. Furthermore, the host has full moderation controls available, including chat admin tools and speaker management, all from the same broadcast page. This depth of control is what separates a true webinar page creator tool from a simple video embed solution.

Broadcast Recordings and Content Repurposing

Every broadcast session recorded through Pageinar is saved automatically in your dashboard. Under Broadcast Recordings in the Settings panel, each session displays the name, duration, and date. Moreover, you can export recordings and repurpose them as on-demand video content. For example, upload a recording to YouTube, embed it in a follow-up email campaign, or use it as a downloadable resource in a content marketing series. Therefore, one live webinar generates multiple content assets with no additional effort on your part. Additionally, the Subscription Details panel shows your remaining broadcast minutes so you always know your available capacity before going live. In short, planning large or recurring events becomes much more predictable when you have full visibility into your plan limits at all times.

Chat and Engagement Features in a Webinar Page Creator Tool

A webinar page creator tool is only as effective as its audience engagement features. Pageinar integrates a full-featured group chat panel directly into every broadcast page. First, configure the chat type, offline message, and chat admin settings from the Chat Settings panel in your dashboard. Then, choose from multiple visual chat themes to match your brand identity and event tone. For example, a dark theme suits a technology-focused product demo, while a light theme works better for a formal corporate training. Moreover, you can control whether the chat panel displays viewer and speaker names. As a result, you shape exactly how formal or casual the event atmosphere feels for your attendees. Additionally, the offline chat message greets participants who arrive before the broadcast begins, so the page always feels active and welcoming rather than empty. In other words, the platform manages the full attendee experience from the moment they land on your URL to the moment the event concludes.

Pageinar webinar landing page illustration 3

Webinar Page Creator Tool Use Cases and Real Examples

The flexibility of a webinar page creator tool means it adapts naturally to a wide range of business scenarios. For example, a SaaS company can use Pageinar to run weekly product demos for prospective customers. Each demo session gets its own broadcast page with a unique cover image and branded event description. Moreover, a corporate training department can use the same platform for internal onboarding webinars with new employees. In that situation, the password protection feature keeps each session private and secure. Additionally, marketing agencies regularly use broadcast pages to host live panel discussions with industry experts, collecting leads through the registration form before each event. Furthermore, nonprofit organizations use the platform to host fundraising streams and live Q&A sessions with donors and supporters. In short, any scenario that calls for a fast, professional, no-install live event page is the ideal use case for a platform like Pageinar. For broader inspiration on live event strategy, read our post on Unlock the Power of Seamless Webinars with Pageinar.

Product Launch Webinars

Product launch webinars represent one of the highest-impact use cases for a live event page. First, you create a registration page that builds anticipation and collects early sign-ups from your target audience. Then, on launch day, you toggle to Broadcasting Mode and present your product live to an engaged crowd. Moreover, the integrated chat lets viewers ask questions in real time, which increases trust and purchase intent significantly. Additionally, your social links are visible on the broadcast page so excited viewers can follow your brand immediately after the session. As a result, a single product launch event can drive registrations, social follows, and direct sales all from one page with no third-party integrations required.

Online Training and Corporate Learning

Educators and corporate trainers benefit greatly from a hosted broadcast page solution. For example, you can schedule a multi-session training course by simply updating the event date and description before each new session. Additionally, the built-in lead collection form gathers attendee information for certification records or post-session follow-up. In fact, the custom field options in Registration Settings let you capture job title, department, or any other data that your training program requires. Therefore, Pageinar serves as both a delivery platform and a lightweight registration system for structured learning programs, all without any additional software or integrations.

Tips for Getting the Most From Your Webinar Page Creator Tool

To maximize the results you get from your webinar page creator tool, apply these practical best practices from the start. First, always set your event date and time in Registration Settings so attendees see a countdown timer on the registration page. This urgency element consistently improves sign-up conversion rates. Second, use a high-quality branded cover image rather than a plain background color for your page header. In fact, a strong visual impression increases perceived professionalism and event credibility significantly. Third, write your chat offline message in advance so early arrivals are welcomed as soon as they land on the page. Moreover, run a complete broadcast test at least once before the actual event date to confirm your camera and microphone work correctly. Additionally, export your registered attendees list after each event and add contacts to your email marketing list for targeted follow-up sequences. Therefore, every webinar you host becomes a compounding asset for future marketing rather than a one-off activity. Finally, use the recording export feature to turn live content into on-demand videos, written summaries, or short-form social media clips that extend the life of each session.

Choosing the Right Webinar Page Creator Tool for Your Needs

When selecting a webinar page creator tool, the most important criteria are ease of setup, the quality of the viewer experience, and the depth of built-in features. Pageinar excels in all three areas consistently. First, setup takes under ten minutes with no technical background required whatsoever. Second, the viewer experience is fully browser-based, so no attendee is ever blocked by a download prompt, a plugin requirement, or a compatibility error. Third, the full feature set covers lead collection, live chat, broadcasting, and recording export all within one hosted platform. Additionally, the subscription model is completely transparent, displaying your remaining broadcast minutes and attendee capacity directly in the dashboard at all times. Therefore, you always know your plan limits before starting any event. In short, Pageinar is the webinar page creator tool designed for speed, simplicity, and consistent results regardless of event size or frequency.

Start Building Your Webinar Page Today

Ready to launch your next live event with a professional webinar page creator tool? Visit Pageinar and sign in with your Google account to get started in minutes. Your broadcast page is created automatically on first login. Customize it with your branding, share the URL with your audience, and go live whenever you are ready. No technical setup required on your end, and no plugins required for your attendees. Just a clean, professional broadcast page that works on any device and delivers a seamless experience from registration to replay. Start your first webinar today and discover why leading brands choose Pageinar as their go-to broadcast page solution.

Build a Webinar Page Without Coding: The Full Guide

Build a webinar page without coding is now possible for anyone, regardless of technical background. Pageinar is a hosted broadcast landing page platform. It delivers a fully branded, professional webinar experience in just a few minutes. In fact, there are no plugins to install and no server configurations to manage. Furthermore, no HTML knowledge is required. Simply log in with your Google account, customize your page, and share the URL. Your viewers join directly from their browser without downloading any software.

Pageinar webinar landing page illustration 1

Why Build a Webinar Page Without Coding?

Traditionally, hosting a webinar required installing desktop software, configuring a CMS, and connecting multiple third-party tools. However, most small business owners, coaches, and marketers do not have a dedicated developer available. Therefore, the ability to build webinar page without coding has become the fastest-growing trend in online event hosting. Moreover, skipping the traditional tech stack means you launch faster, spend less on setup, and eliminate costly technical mistakes before your first attendee even registers.

Additionally, when you choose to build webinar page without coding, you dramatically cut the time from idea to live event. In fact, no-code platforms reduce setup time by over 70% compared to traditional self-hosted methods. As a result, you invest your energy in crafting a compelling presentation and promoting the event. Ideally, your hosting platform handles every layer of technical complexity so you can focus on delivering value to your audience.

How to Build Webinar Page Without Coding Using Pageinar

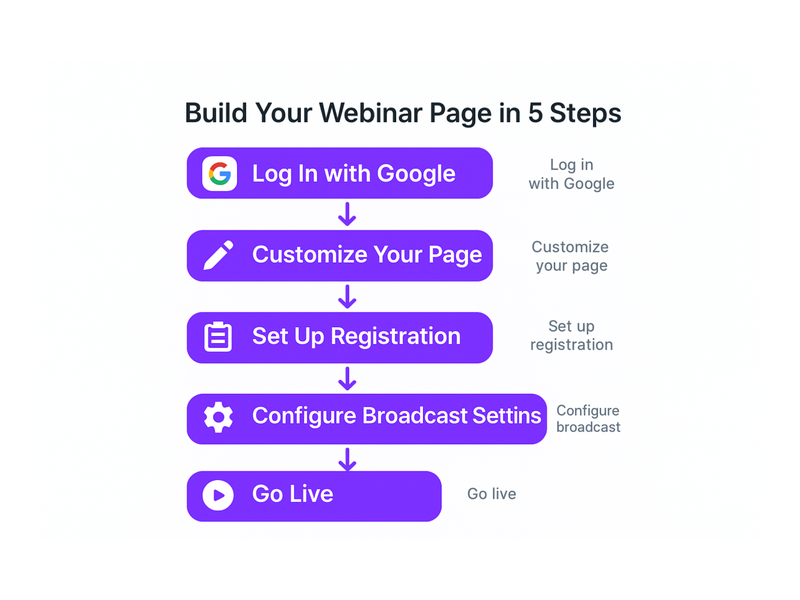
Pageinar makes it remarkably easy to build webinar page without coding in five straightforward steps. Furthermore, the entire process takes less than ten minutes from your very first login to having a shareable page ready to promote. Here is exactly what to expect at each stage.

Step 1: Log In with Google

First, visit the Pageinar no-code webinar platform and click the Google login button. There is no email form to fill out and no password to create. In seconds, you land directly on your personal broadcast landing page. This is the exact page you will customize and share as your webinar URL. It is immediately live and accessible to anyone with the link.

Step 2: Customize Your Broadcast Page Header

Second, personalize the top section of your broadcast page. You can upload a cover image and choose a background color. You can also add your avatar, enter your webinar title, include your website URL, and write a short event description. All edits happen directly on the page with simple click-and-type interactions. There is no backend dashboard to navigate and no code editor to open. Simply click the element you want to update and see the result immediately.

Step 3: Configure Registration Mode

Third, toggle your page to Registration Mode using the control in the top-right corner. In this mode, your webinar page becomes a clean sign-up form that collects attendee information before the event begins. You can customize the registration template and background color. You can also add your event date and time and configure lead fields such as First Name, Last Name, Company, Email, and Phone. Moreover, each field is individually toggleable so you collect exactly the data you need.

Additionally, you can enable a countdown timer on the registration page. This builds urgency and reminds registrants how close the event is. You can also upload a promotional header image or video to create a more engaging first impression. To explore lead collection in full detail, visit the Pageinar Knowledge Base guide on how to collect leads before the broadcasting event.

Step 4: Configure Broadcast Settings

Fourth, open the Settings panel by clicking the gear icon on your page. In Broadcast Settings, you can password-protect your webinar page so only invited guests gain access. You can also add social media profile links for Facebook, Instagram, Twitter, YouTube, and Twitch. These links appear directly on your broadcast page so viewers can stay connected to your brand after the live event ends.

Step 5: Set Up Your Chat Panel

Fifth, configure the built-in group chat on the bottom-left section of your broadcast page. In Chat Settings, you can select the chat type, compose an offline welcome message for early arrivals, assign a chat admin, and choose from multiple visual chat themes. As a result, your attendees enjoy a fully moderated live discussion without installing any separate chat application or signing up for a third-party service.

Pageinar webinar landing page illustration 2

Step 6: Go Live in Broadcasting Mode

Finally, toggle your page to Broadcasting Mode and click the Start Broadcast button. Your page immediately switches from a registration experience to a live broadcast. Attendees see your live video feed, your branded event header, and the integrated chat panel all on one page. Moreover, viewers join from any browser on any device with no software downloads required. The experience is completely friction-free from start to finish.

Key Features You Get When You Build Webinar Page Without Coding

When you build webinar page without coding on Pageinar, you receive a complete event-hosting feature set right out of the box. In other words, you do not need to assemble a tech stack from separate tools or manage multiple vendor subscriptions. Everything lives on one hosted page, controlled through simple settings panels. Below are the standout capabilities that make Pageinar the ideal choice for no-code webinar hosting.

Automated Lead Collection

One of the most powerful built-in features is automated lead collection. When Registration Mode is active, every attendee who registers is saved to your Registered List inside the Settings panel. You can search, filter, and export this list at any time. Therefore, after every webinar you walk away with a clean attendee database that includes names, companies, emails, and phone numbers. It is ready for immediate use in your email marketing or CRM follow-up workflow.

Automatic Broadcast Recordings

Additionally, Pageinar records every live broadcast session automatically. After the event ends, the recording appears in the Broadcast Recordings section of your Settings panel with the name, duration, and date clearly listed. You can export recordings and repurpose them as on-demand video, social media clips, or course material. In fact, this feature turns every webinar you host into an evergreen content asset that keeps delivering value long after the live session concludes.

Password-Protected Webinar Pages

For paid events or private sessions, you can add a page password with a single click in Broadcast Settings. This is ideal for internal company training, exclusive member webinars, or paid virtual workshops. Furthermore, enabling this protection is entirely no-code. Simply type a password in the designated field and save the change. Only attendees who enter the correct password will gain access to your broadcast page.

Full Brand Customization

Branding consistency matters during a live event. Pageinar lets you add your cover image, avatar, event title, and description to create a page that reflects your brand identity. In addition, social media links display directly on your broadcast page so viewers can follow your channels before and after the session. Together, these tools help you deliver a polished, professional event without hiring a designer or writing a single line of code.

Who Should Build a Webinar Page Without Coding?

The ability to build webinar page without coding delivers immediate value across a wide range of industries. First, small business owners who want to run product demos or customer training sessions can get started today with no technical help. Second, coaches and consultants who host live Q&A sessions or virtual workshops no longer need a developer to set up their event infrastructure. Third, marketing managers at larger organizations can launch event pages without waiting for developer availability or navigating complex IT approval processes.

For example, a nonprofit organization can host fundraising webinars and capture donor contact information through the built-in registration form. Alternatively, an e-commerce brand can run live product launches complete with a moderated chat panel for real-time audience questions. In short, any professional who wants to connect with an online audience without wrestling with complex technology will find Pageinar to be the right solution. The platform works equally well for a solopreneur hosting their first webinar and a large enterprise running regular broadcast events.

Moreover, educators and online instructors benefit greatly from the platform’s approachable design. In fact, any teacher or corporate trainer can set up a live session page, collect participant registrations, and run a fully interactive broadcast with the integrated chat panel. Therefore, the no-code model removes every traditional barrier that once prevented non-developers from hosting professional live events. Better still, when you build webinar page without coding, Pageinar works on any device and requires no software on the viewer side.

Pageinar webinar landing page illustration 3

Tips to Maximize Your No-Code Webinar Page

Once you build webinar page without coding, a few proven best practices will help you maximize attendance and engagement. First, share your webinar page URL across social media channels, your email list, and your website at least one week before the event. Second, activate the countdown timer in Registration Mode to build urgency and remind registrants how close the event is. Third, write a clear, benefit-focused headline on your registration page so visitors immediately understand the value they will receive.

In other words, everything you need to build webinar page without coding and run a successful live event is already built into the platform. Additionally, configure your chat panel with a warm offline welcome message so early arrivals feel acknowledged before the broadcast begins. Furthermore, assign a dedicated chat admin to greet attendees, answer pre-broadcast questions, and keep the discussion focused during the live session. In fact, well-moderated webinar chats consistently produce higher attendee satisfaction scores and longer watch times.

Finally, review your Registered List the day before your event to understand your audience and tailor your content accordingly. After the broadcast ends, export the attendee list and follow up within 24 hours. According to Wikipedia’s overview of webinar formats and best practices, timely post-event follow-up is one of the strongest predictors of converting webinar attendees into paying customers or long-term clients.

Pageinar vs. Traditional Webinar Setup

When you build webinar page without coding on Pageinar, you completely bypass the time-consuming work that traditional setups require. A conventional self-hosted approach involves purchasing a domain, configuring web hosting, installing a CMS, adding a webinar plugin, and testing everything before the event begins. That process can take days or even weeks for someone without a technical background. Additionally, traditional setups require ongoing maintenance to keep plugins updated and servers secure between events.

In contrast, Pageinar delivers a complete, fully hosted webinar page the moment you log in with Google. Moreover, you never need to worry about hosting outages, plugin conflicts, or server overloads during your live broadcast. As a result, your mental energy stays where it belongs: on preparing engaging content and connecting with your audience. For a broader look at everything Pageinar offers live event hosts, read our post on Unlock the Power of Seamless Webinars with Pageinar: Welcome to a New Era of Online Engagement!

Start Today and Build Webinar Page Without Coding

Build webinar page without coding has never been more accessible or more straightforward. Pageinar removes every technical barrier between you and a professional live broadcast event. In just minutes, you can have a fully branded, registration-ready, broadcast-capable webinar page published and ready to share. There has never been a better time to start hosting live events, growing your audience, and building meaningful connections with people who want to hear from you.

Visit Pageinar today, log in with your Google account, and launch your first webinar page in minutes. Your audience is ready and waiting. All you need to do is share the link and go live.

Webinar Registration Page with Chat: Build Yours Fast

A webinar registration page with chat transforms the way hosts connect with their audience before, during, and after an event. Instead of sending attendees to a static sign-up form, you give them a live, interactive space where they can ask questions, share excitement, and feel part of a community from the very first click. Pageinar combines both features on a single hosted page, so you never need to juggle multiple tools or plugins to run a successful online event. In this guide, you will learn how to set up, customize, and optimize your own webinar registration page with chat to increase sign-ups and audience engagement.
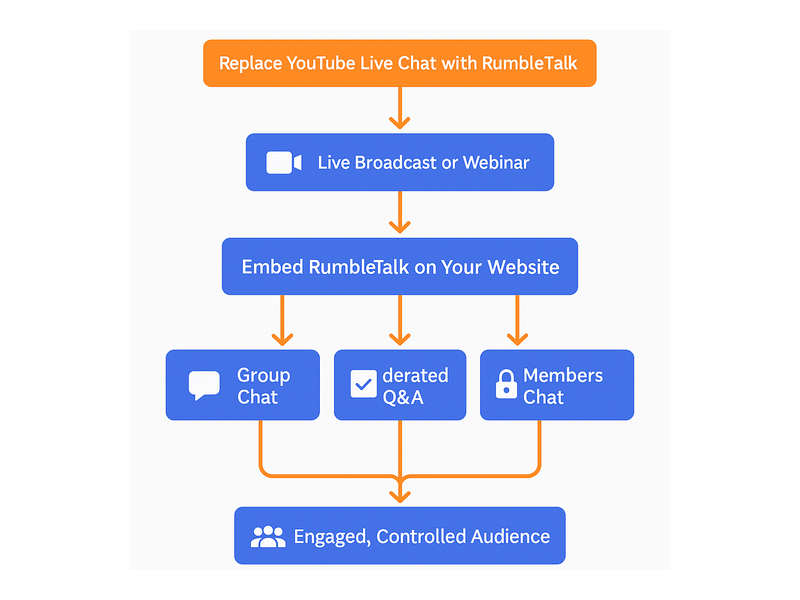
Pageinar webinar landing page illustration 1

What Is a Webinar Registration Page with Chat?

A webinar registration page with chat is a hosted landing page that accomplishes two goals at once. First, it collects attendee information through a customizable sign-up form. Second, it activates a live group chat so visitors can interact with the host and each other immediately upon arriving. This combination turns a passive sign-up step into an engaging pre-event experience that builds anticipation and community well before the broadcast begins.

Traditional event pages force hosts to choose between collecting leads and sparking conversation. However, modern audiences expect both. Moreover, platforms that offer only a static form see higher drop-off rates because visitors feel no real connection to the upcoming event. A webinar registration page with chat solves this problem by giving visitors a reason to stay longer, explore the content, and commit to attending instead of bouncing away.

Why Chat Transforms Your Webinar Registration Page with Chat

Chat is not just a nice-to-have feature on a webinar registration page with chat. In fact, research from the Demand Gen Report shows that interactive content doubles engagement rates compared to static pages. Therefore, adding a live chat module to your registration page directly impacts how many visitors convert into confirmed attendees and how many of those attendees actually show up on broadcast day.

For example, a visitor lands on your registration page and sees five people already chatting about the upcoming session. They read messages like ‘Can not wait for the Q and A segment!’ and immediately feel social proof that the event is real and worth attending. As a result, they register because the page feels alive rather than abandoned. This effect is nearly impossible to replicate with a plain sign-up form alone.

Additionally, chat lets the host warm up the audience before the broadcast begins. The host can post announcements, share agenda items, and answer early questions, all inside the same webinar registration page with chat. Furthermore, these pre-event interactions generate valuable insight into what topics matter most to attendees, so the host can tailor the presentation for maximum impact on the day of the event.

How Pageinar Delivers a Webinar Registration Page with Chat

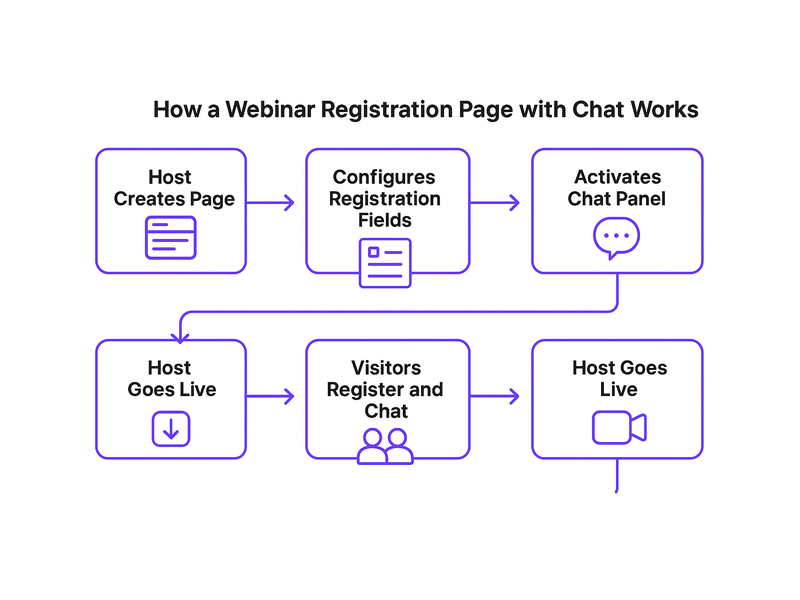
Pageinar is built specifically for hosts who want a webinar registration page with chat without any technical setup. You log in with your Google account, land on your personal broadcast page, and immediately access two modes: Registration Mode and Broadcasting Mode. Toggle to Registration Mode and your page becomes a lead-capture form with a live chat panel built right in, ready for attendees within seconds of configuration.

No plugins, no code, and no third-party integrations are needed. Pageinar’s instant webinar landing page platform hosts everything for you. You customize the page appearance, set your event date and time, configure the registration fields, and share the URL with your audience. Attendees visit the link, fill out the form, and start chatting before the event even begins, creating organic buzz that drives even more sign-ups.

Registration Mode Features on Your Webinar Registration Page with Chat

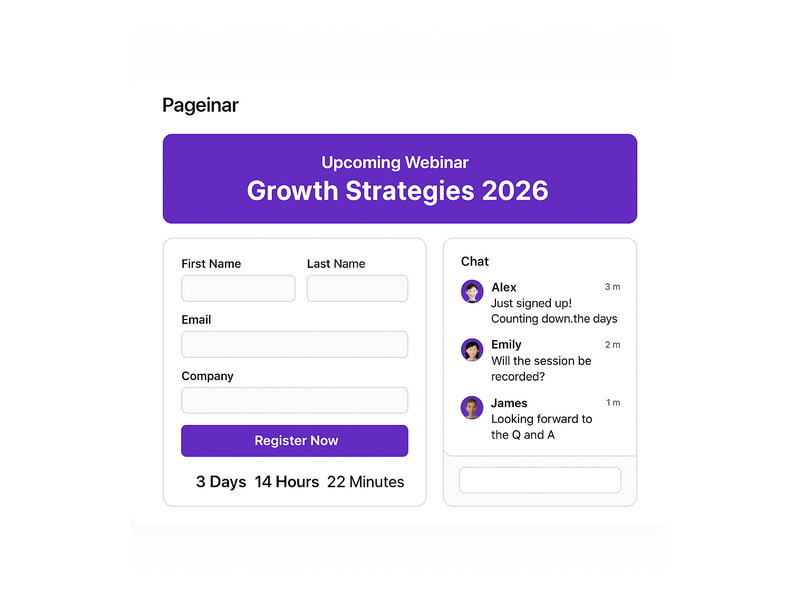
In Registration Mode, your webinar registration page with chat displays a fully customizable form that is easy and fast for visitors to complete. The form supports these lead fields: First Name, Last Name, Email, Phone, Company, and custom fields you define for your specific audience. Each field is toggleable, so you collect only the data you need without overwhelming visitors with a lengthy form. Additionally, you set a background color or header image to match your brand, add a welcome message, and configure the event date and countdown timer to create urgency for undecided visitors.

The chat panel sits alongside the registration form, powered by a robust group chat engine. Hosts access full moderation controls: mute users, pin messages, switch chat themes, and display a list of active viewers and speakers. As a result, you maintain a professional, on-brand experience even in the pre-event lobby, which sets a high-quality tone for the entire broadcast experience that follows.

Setting Up Your Webinar Registration Page with Chat Step by Step

First, visit pageinar.com and sign in with your Google account. Second, you land on your main broadcast page. Third, open the Settings panel by clicking the gear icon in the top-right corner. Fourth, navigate to Registration Settings and follow the numbered steps below to complete the full setup of your webinar registration page with chat.

  1. Choose a registration template: Pageinar offers multiple registration page templates. Pick the layout that fits your brand style and the tone of your specific event.
  2. Set the event date and time: Enter the broadcast date and activate the countdown timer so visitors feel urgency to register before the event fills up.
  3. Configure lead fields: Toggle on First Name, Last Name, Email, Company, and any custom fields that are relevant to your specific audience and follow-up workflow.
  4. Write a welcome message: Add a short, welcoming headline that explains the core value of attending your event and what attendees will walk away knowing.
  5. Upload a header image or video: A strong visual header increases perceived professionalism and improves sign-up conversion rates significantly for any event type.
  6. Switch to Registration Mode: Use the toggle in the top-right corner of your main page so every visitor who lands on your URL sees the sign-up form and the live chat panel.
  7. Configure chat settings: Open Chat Settings from the gear icon and choose a chat theme, set the offline message, and assign a chat admin to moderate the pre-event conversation.
  8. Share your URL: Copy your unique Pageinar page URL and post it in emails, social media posts, LinkedIn newsletters, or event listing directories to start driving registrations.

After completing these steps, your webinar registration page with chat is live and ready to capture attendees. Moreover, every registration automatically appears in your Registered List inside the Settings panel, where you can search, filter, and export leads at any time before or after the event. Learn more about capturing attendee data in the Pageinar knowledge base article on how to collect leads before the broadcasting event.

Pageinar webinar landing page illustration 2

Customizing the Chat on Your Webinar Registration Page with Chat

The built-in chat on your webinar registration page with chat supports multiple visual themes designed for different event styles and audiences. For example, a dark theme suits tech summits and gaming broadcasts, while a light theme fits corporate webinars and educational sessions. Therefore, choose a theme that matches your audience’s expectations and reinforces your brand identity throughout the registration experience.

Additionally, Pageinar’s Chat Settings let you control the participant display inside the chat panel. Toggle the Show Viewers and Speakers option to display a live list of active participants, which creates a strong sense of community even before the event starts. In other words, new visitors see that real people are already engaged and registered, and that social proof pushes undecided visitors to sign up without hesitation.

Furthermore, the offline message feature lets you display a custom text when the host is not actively in the chat. For a webinar registration page with chat, set the offline message to something like: Welcome, please register below and join the conversation while you wait. This simple message keeps visitors engaged, reduces the page bounce rate, and makes the experience feel intentional and professional rather than abandoned.

Moderation Tools for a Professional Chat Experience

As the chat admin on your webinar registration page with chat, you control the conversation quality at all times. Pageinar’s chat panel includes mute and remove options so you can quickly handle disruptive messages without interrupting the flow for other participants. Additionally, you pin important announcements at the top of the chat feed so every new visitor immediately sees the most relevant event information, agenda highlights, and joining instructions.

Together, these moderation tools create a safe and welcoming environment that encourages genuine conversation and professional networking. As a result, attendees arrive at the live broadcast already familiar with each other and with the host, which leads to richer Q and A exchanges, higher participation rates, and stronger audience satisfaction scores after the session ends.

Best Practices for a High-Converting Webinar Registration Page with Chat

Ideally, your webinar registration page with chat should follow these proven best practices to maximize both sign-up conversions and pre-event community engagement among your target audience.

  • Keep the form short: Ask for only the fields you truly need. First Name and Email are enough for most events. Each additional field reduces conversions by roughly 10 percent, so be selective.
  • Use a countdown timer: A visible countdown creates urgency and motivates visitors to register right now rather than saving the link and forgetting to come back later.
  • Post a welcome message in chat early: As the host, post a brief greeting in the chat as soon as you share the URL. This seeds the conversation and signals that the event is active and well-organized.
  • Share the page URL at least one week early: Posting the link one to two weeks before the event gives the chat time to fill with early registrants who generate organic excitement for later arrivals.
  • Use a compelling header image or video: Visual content above the fold instantly communicates the event topic and the quality of your brand to every visitor who lands on the page.
  • Password protect exclusive events: If your webinar targets a specific or paid audience, enable the page password from Broadcast Settings to keep the chat private and highly valuable to genuine registrants.

Real-World Use Cases for a Webinar Registration Page with Chat

Many industries benefit from combining registration and live chat on a single hosted page. Below are four real-world scenarios where a webinar registration page with chat creates measurable impact on event outcomes, lead quality, and audience retention.

Product Launch Webinars

When launching a new product, companies use the webinar registration page with chat to build anticipation in the days and weeks before the reveal. Attendees post questions and share excitement in the chat during the registration period, giving the host a clear preview of which features matter most. Therefore, the host tailors the live presentation around the most common questions and delivers a session that resonates deeply with the audience from the very first slide.

Training and Certification Programs

Training providers collect learner data through registration and use the chat panel to share pre-event reading materials, preparation tips, and study resources. Additionally, learners network with peers and ask preparatory questions well before the session starts. As a result, the live training session benefits from a warm, already-connected cohort that participates more actively, retains information better, and completes post-event certifications at a higher rate.

B2B Sales Demos

Sales teams set up a webinar registration page with chat for product demos targeted at high-value prospects and enterprise buyers. Prospects register and immediately ask detailed questions in the chat panel about pricing, integrations, and use cases. The sales team responds in real time, building rapport and trust long before the live demo begins. Furthermore, the Registered List gives the team a clean, exportable file of qualified, named leads ready for immediate follow-up after the event ends.

Community Events and Meetups

Community organizers share a webinar registration page with chat link through newsletters, Slack groups, and social media channels to invite members. Registrants start networking in the chat panel days before the main event takes place. Consequently, the live broadcast itself feels like a reunion rather than a cold introduction, attendance rates improve significantly, and the community grows stronger with each recurring event hosted on the same platform.

Pageinar webinar landing page illustration 3

Tracking and Exporting Leads from Your Webinar Registration Page with Chat

After your event, every registered attendee appears automatically in the Registered List inside Pageinar’s Settings panel. The table displays Name, Company, Email, Phone, and Date Created for each lead collected through your webinar registration page with chat. You search by name or company, and then export the complete list as a file for follow-up email campaigns, CRM imports, or direct sales outreach by your team.

This built-in lead management system makes your webinar registration page with chat a complete event marketing tool from start to finish. You collect leads, engage them with chat before the event, broadcast your session live, and follow up with the exported attendee list, all from one platform without extra software, integrations, or monthly fees for separate tools. In short, Pageinar removes the need for standalone landing page builders, third-party CRMs, and separate chat platforms that each add cost and complexity.

For a deeper look at the full broadcast experience on Pageinar, read Unlock the Power of Seamless Webinars with Pageinar: Welcome to a New Era of Online Engagement!, which covers the complete platform in detail and shows how leading brands use it for large-scale events and audience engagement campaigns.

Webinar Registration Page with Chat: Common Questions Answered

Below are answers to the most common questions hosts ask when setting up a webinar registration page with chat for the first time and preparing for their initial live broadcast event.

Can I password protect my webinar registration page with chat?

Yes. Open the Broadcast Settings panel inside Pageinar and activate the Page Password Protect option. Only attendees who have the correct password can access your webinar registration page with chat. This is ideal for exclusive events, paid webinars, or private corporate sessions with a curated guest list that you control entirely.

How many attendees can register on my page?

The attendee limit depends on your current subscription plan. Free plans include a basic capacity suitable for small events and pilots. Paying plans increase the limit significantly to support larger audiences and multi-session series. View your current limit in the Subscription Details section of the Settings panel and upgrade at any time through the same screen without interrupting your live registration page.

Can I match the chat theme to my brand on the registration page?

Yes. Pageinar’s Chat Settings offer multiple visual themes for your webinar registration page with chat. Choose a dark, light, or colorful theme that matches your brand palette and the tone of your event. Additionally, set a custom offline message so the chat feels branded and intentional even before the host joins the conversation and the event officially starts.

Start Your Webinar Registration Page with Chat Today

A well-designed webinar registration page with chat is one of the highest-impact tools you can add to your event marketing strategy. It collects qualified leads, builds community before the broadcast, and warms up your audience so that everyone arrives engaged and ready to participate. Pageinar makes the entire setup fast and simple, with no coding required and no plugins for attendees to install on their devices.

Sign in at pageinar.com with your Google account today and launch your first webinar registration page with chat in under ten minutes. Your audience is ready to engage. Give them a space where the conversation starts well before the broadcast does, and watch your event attendance and lead quality improve with every session you host.

Hosted Webinar Landing Page: Build, Launch and Convert

A hosted webinar landing page gives your audience one destination to register for and join your live event. In the past, building a hosted webinar landing page required web developers, multiple plugins, and hours of configuration. Today, Pageinar’s no-code webinar platform lets you launch a professional page in under ten minutes. Moreover, the quality of your page directly shapes how many people register. According to Content Marketing Institute research, webinars consistently rank among the top content formats for generating B2B leads. Therefore, choosing the right hosted webinar landing page solution is one of the highest-ROI decisions you can make for your events.

Pageinar webinar landing page illustration 1

What Makes a Hosted Webinar Landing Page Effective

Not every hosted webinar landing page delivers the same results. Additionally, the difference between a high-converting page and a weak one comes down to a few key elements. First, your page needs a clear, benefit-focused event title. Second, it needs a concise description that tells visitors exactly what they will gain. Third, it needs a visible and simple registration form. Together, these three elements create a strong first impression that turns casual visitors into confirmed registrants.

Furthermore, your page must load quickly and display well on all devices. In other words, mobile responsiveness is not optional today. Most of your audience will open your event invitation on a smartphone. Therefore, your page must look polished on every screen size. Pageinar handles all device optimization automatically, so you never need to touch a line of code.

Essential Elements of a High-Converting Webinar Page

  • Benefit-focused event title: State the topic and outcome so visitors understand the value immediately.
  • Host avatar and name: Build trust by showing who leads the session.
  • Date, time, and time zone: Eliminate confusion by displaying the event schedule clearly.
  • Short registration form: Ask only for the information you truly need.
  • Strong CTA button: Use action-oriented text such as Register Now or Reserve My Spot.
  • Countdown timer: Create urgency by showing the time remaining before your event starts.

Alternatively, add a short teaser video to the header to increase engagement and registrations further. In addition, social proof such as partner logos or speaker bios adds credibility. Pageinar supports all of these elements natively and lets you enable or disable each one with a single toggle inside the settings panel.

How to Set Up Your Hosted Webinar Landing Page with Pageinar

Setting up a hosted webinar landing page with Pageinar is straightforward. In fact, you can go from sign-up to a live, shareable page in under ten minutes. First, visit pageinar.com and log in using your Google account. Second, you arrive directly at your main broadcast page. Third, you start customizing it immediately using the built-in editor, with no code required.

Step 1: Customize Your Cover and Header

After logging in, your broadcast page opens in edit mode. Therefore, start by clicking the cover area at the top of the page. You can upload a background image or choose a solid color. In addition, upload your avatar to add a personal or branded touch. Next, edit the event title and description to match your webinar topic. These details appear prominently on your page, so make them specific and compelling to drive registrations.

Step 2: Switch to Registration Mode

Pageinar gives you two distinct modes for your hosted webinar landing page. In Registration Mode, visitors see your event details and a lead capture form. In Broadcasting Mode, the live video stream takes center stage. You toggle between these modes using the button in the top-right corner. Therefore, keep your page in Registration Mode before your event to collect attendee details. For a full walkthrough, visit the knowledge base article on how to collect leads before the broadcasting event.

Step 3: Configure Registration Settings

Open the gear icon to access the settings panel. Inside, click Registration Settings to configure your lead form. Additionally, set the event date and time, choose a page template, and upload a header image or video. You can toggle individual lead fields on or off. For example, you might collect First Name, Last Name, Company, and Email. Ideally, keep the form short to maximize conversions and reduce drop-off on your registration page.

Pageinar webinar landing page illustration 2

Key Features of a Pageinar Hosted Webinar Landing Page

Pageinar packs a complete toolkit into every hosted webinar landing page. Moreover, all features are available from a single dashboard with no plugin installs. Here is a breakdown of the most impactful capabilities you get right out of the box.

Built-In Live Broadcasting

Your page includes a fully integrated live broadcasting area. As a result, attendees click your URL, see the live video stream, and interact with you in real time, all from the same page. You start broadcasting by clicking the Start Broadcast button in the bottom-right section. Furthermore, Pageinar automatically tracks your broadcast duration so you always know how much live time remains on your current plan. This makes managing long sessions easy and stress-free.

Integrated RumbleTalk Group Chat

Every Pageinar page includes a built-in RumbleTalk group chat panel. This panel sits in the bottom-left area and lets attendees ask questions, react, and connect in real time during your broadcast. As the host, you have full admin controls. Therefore, you can moderate messages, pin announcements, and apply custom chat themes. For more on how the chat experience fits the broader platform, read Unlock the Power of Seamless Webinars with Pageinar: Welcome to a New Era of Online Engagement!

Lead Collection and Registered List

Your page automatically stores every registrant’s details in real time. Additionally, you access the full list inside the Registered List section of your settings panel. From there, search by name or email and export the entire list to a spreadsheet. As a result, every webinar you run becomes a lead generation event. In short, you grow your contact database with every broadcast, without any third-party integrations or extra tools.

Password Protection and Social Links

Not every event is open to the public. Therefore, Pageinar lets you add password protection to your broadcast page with a single click inside Broadcast Settings. This is ideal for private client sessions, paid-access programs, or internal company events. In addition, you can add social media links to your page. Pageinar supports Facebook, Instagram, Twitter, YouTube, and Twitch. Together, these links help you build a consistent brand presence alongside every live event you host.

Broadcast Recordings

After each event ends, Pageinar stores your recording automatically. In other words, you never need a separate recording tool or service. You access all recordings inside the Broadcast Recordings section of the settings panel. Each entry shows the session name, duration, and date. Furthermore, you can export recordings to share with attendees who missed the live session. This extends the value of your content well beyond the original broadcast date and builds a growing content library over time.

Best Practices for a Hosted Webinar Landing Page That Converts

Building a hosted webinar landing page is only the first step. However, optimizing it for conversions takes a bit of strategic planning. Here are the best practices that experienced webinar hosts use to consistently fill their events with quality attendees.

Write a Benefit-Focused Event Title

Your event title is the first thing every visitor reads. Therefore, it must communicate a clear, specific outcome. For example, instead of writing ‘Q3 Product Update,’ write ‘3 Features That Will Save Your Team 5 Hours a Week.’ In addition, use a number or measurable result when possible. As a result, your title speaks directly to what your audience wants to achieve and gives them a compelling reason to register right away.

Use a High-Quality Header Image or Video

Visual design strongly influences how credible and professional your page feels. Moreover, a polished cover image signals quality and builds instant trust with new visitors. Use an image that clearly reflects your webinar topic. Alternatively, embed a short teaser video in the header to increase time-on-page and registrations. Either way, strong visuals make your hosted webinar landing page more memorable and shareable across social media channels.

Drive Traffic From Multiple Channels

Your page URL is the single link you share everywhere before your event. Therefore, distribute it across email newsletters, LinkedIn posts, Twitter threads, and any community you are active in. In addition, schedule two or three reminder emails to your existing audience list as the event date approaches. Furthermore, ask co-hosts or speakers to share the link with their own audiences. Together, these distribution tactics maximize your registrant count before the event starts.

Enable the Countdown Timer

Urgency is one of the most powerful conversion drivers on any registration page. In fact, adding a countdown timer to your hosted webinar landing page can significantly increase last-minute registrations. Pageinar’s Registration Settings include a show timer toggle. When you enable it, visitors see a live countdown to your event date. As a result, they feel motivated to register now rather than putting it off and potentially forgetting entirely.

Pageinar webinar landing page illustration 3

Who Benefits From a Hosted Webinar Landing Page

A hosted webinar landing page is useful across a wide range of industries and professional use cases. First, B2B companies use it for product demos, customer training sessions, and thought leadership events. Second, educators and coaches use it to deliver live workshops and courses. Third, marketing teams use it to generate leads from live content without building a custom page from scratch. Additionally, event organizers use it to manage registrations for online conferences and industry panels.

Furthermore, agencies and consultants benefit greatly when they want to showcase expertise to prospective clients. For example, a digital marketing agency might host a monthly live Q&A session using the same Pageinar page for every event. They simply update the title, date, and description before each session. In other words, the page becomes a permanent event hub. Attendees bookmark it and return each month, building a loyal live audience over time.

For enterprise teams working with high-profile partners, Pageinar’s professional infrastructure meets demanding standards. In short, the platform works equally well for a solo creator hosting their first event and a large team running a global broadcast series. The no-install experience means attendees from any organization can join without IT approval or software downloads.

Why Pageinar Is the Right Choice for Your Hosted Webinar Landing Page

Many platforms claim to offer hosted webinar solutions. However, most require complex setup, plugin installations, or expensive contracts before you can run your first event. Pageinar is different. In short, you log in with Google and your hosted webinar landing page is ready. No code. No plugins for attendees. No technical configuration required on your side.

Additionally, everything lives on a single, shareable URL. Attendees click one link and access the registration form, the live broadcast, and the group chat all from the same page. As a result, the experience feels seamless for both host and audience. Moreover, Pageinar works on any device without attendees installing any software. Therefore, your audience can join from a laptop, tablet, or phone with equal ease and no friction at all.

Furthermore, Pageinar offers flexible subscription plans for events of every size. Whether you are hosting a small private session or a large public broadcast, there is a plan that fits your needs and budget. You can upgrade, downgrade, or cancel at any time from the Subscription Details panel. In addition, billing is transparent and PayPal-based, so there are never any surprise charges on your account.

Get Started With Your Hosted Webinar Landing Page Today

A hosted webinar landing page is one of the most effective tools available for growing your audience, generating qualified leads, and delivering live content at scale. Moreover, Pageinar makes the entire setup faster and simpler than any other solution. In fact, you can go from sign-up to a live, shareable hosted webinar landing page in under ten minutes, with no technical experience required. Therefore, there is no reason to delay your first event.

Visit pageinar.com today, sign in with Google, and launch your first hosted webinar landing page. Set your event date, upload your cover image, enable the registration form, and start sharing your unique page URL. As a result, your next webinar can attract more registrants, generate more leads, and deliver a more professional experience than ever before. Start building your page now and see what a fully hosted, no-code broadcast solution can do for your events and your audience.

Create Webinar Page with Registration: Complete Guide

Creating a webinar page with registration is one of the most powerful steps any business or creator can take to build a committed, engaged audience before a single word of your broadcast has aired. When you create a webinar page with registration on Pageinar, every visitor lands on a professional, branded event page that invites them to sign up, share their details, and confirm their seat. Moreover, you collect those contact details automatically, transforming casual interest into a curated lead list you own. In this guide, you will learn exactly how to set up your registration page, configure the right lead fields, customize the design, and run a successful broadcast from start to finish.

Pageinar webinar landing page illustration 1

Why You Should Create a Webinar Page with Registration

A webinar registration page serves as both a marketing tool and a lead capture machine at the same time. First, it filters out casual browsers and confirms genuine interest from real attendees who are willing to invest a moment in signing up. Second, it gives you a structured list of names, emails, and company details you can follow up with long after the event ends. Additionally, a well-designed registration page adds immediate credibility to your event by making it feel exclusive, organized, and worth attending. In short, every serious webinar host needs a dedicated registration page before going live.

Furthermore, registration data helps you measure audience demand before you invest significant time in production. According to web conferencing research, events with dedicated registration pages consistently outperform casual invite links in both attendance rates and post-event engagement. For example, if only a handful of people register in the first week, you know you need to promote the event more aggressively. Alternatively, a surge of early sign-ups tells you the topic resonates strongly with your audience and may even justify planning a follow-up series.

Pageinar includes a dedicated Registration Mode alongside its Broadcasting Mode, making it simple to create webinar page with registration without writing a single line of code. Together, these two modes give you a complete event workflow: collect leads in Registration Mode, then switch to Broadcasting Mode when event day arrives. No plugins required for attendees, no downloads, and no technical friction on either side of the screen. In other words, Pageinar handles the infrastructure so you can focus entirely on content and audience growth.

How to Create a Webinar Page with Registration on Pageinar

Setting up your first webinar registration page on Pageinar takes less than ten minutes. Follow these five steps to build your page and start collecting sign-ups today.

Step 1: Sign In and Access Your Main Page

First, visit pageinar.com and sign in using your Google account. After login, Pageinar takes you directly to your main broadcast landing page. This single page serves as both your webinar registration page and your live broadcast stage for every event you host. You do not need to create a separate page for each new broadcast. Instead, you update your existing page for each event, keeping everything organized under one URL that your audience already recognizes and trusts.

Step 2: Customize Your Event Header

Next, personalize your page header to match your upcoming event. Click the cover area at the top to upload a background image or select a brand color that fits your visual identity. Add your avatar, enter your webinar title in the title field, and write a short, compelling description that explains exactly what attendees will gain by joining. Additionally, include your website URL so visitors can learn more about your organization before they decide to register. Together, these header elements create a professional first impression that meaningfully increases your sign-up conversion rate.

Step 3: Switch to Registration Mode

To create webinar page with registration functionality, toggle your page from Broadcasting Mode to Registration Mode using the button in the top-right corner of the page. In Registration Mode, your page displays a sign-up form instead of the live broadcast area. As a result, any visitor who lands on your URL sees a clear invitation to register rather than an empty broadcast screen. This simple toggle transforms your page from a broadcast stage into a powerful lead collection hub within seconds.

Step 4: Configure Registration Settings

Open the gear icon to access the Settings panel, then navigate to Registration Settings. Here you can set the event date and time, choose a registration page template, customize the background color, add a personalized welcome message, and upload a header image or short teaser video. Moreover, you can enable a countdown timer that shows visitors exactly how many days, hours, and minutes remain until the event starts. This countdown creates urgency and consistently drives faster registrations among undecided visitors. For a detailed walkthrough of every option, visit the Pageinar Knowledge Base for step-by-step guidance on registration configuration.

Step 5: Set Up Your Lead Collection Fields

In the Registration Settings panel, you also control which lead fields appear on your sign-up form. By default, the form collects First Name, Last Name, and email address from every registrant. However, you can also enable Company, Phone, and custom fields by toggling each one individually to match your specific needs. Therefore, you capture exactly the information your sales or marketing team needs for effective post-event follow-up. Keep the form concise. In fact, research consistently shows that shorter forms produce more registrations, so only request fields that your team will genuinely act on after the broadcast ends.

Pageinar webinar landing page illustration 2

Customizing Your Webinar Registration Page

Beyond the basic setup, Pageinar gives you several powerful tools to make your webinar registration page look polished and fully on-brand. For example, you can choose from multiple registration page templates that control the layout and color scheme of your sign-up form. Additionally, you can upload a custom header image or embed a short teaser video that gives visitors a compelling preview of your content before they commit to attending. Each of these options helps you create a registration experience that reflects your brand identity and converts better than a plain generic form.

Furthermore, the welcome message field lets you communicate directly with potential attendees before they sign up. Use this space to outline the event agenda, highlight guest speakers, or announce a special bonus available only to registered attendees. In other words, treat your webinar registration page as the primary sales pitch for your event. Make it compelling enough that visitors feel they simply cannot miss the broadcast. A strong, specific welcome message alone can meaningfully lift your overall sign-up rate.

Ideally, you should preview your registration page on both desktop and mobile before sharing the link publicly. Pageinar pages are fully responsive and accessible on any device, so your attendees can register from a smartphone, tablet, or desktop without any friction. Therefore, you maximize your potential audience by removing every technical barrier from the sign-up process. As a result, more visitors complete registration and fewer abandon the page partway through.

How to Manage and Export Your Webinar Registrations

After visitors start signing up, Pageinar automatically stores their details in the Registered List. To view your registrations, open the Settings panel and navigate to the Registered List tab. There you will find a searchable table displaying each attendee’s name, company, email address, phone number, and registration date. Additionally, you can export the entire list and import it directly into your CRM or email marketing platform to begin follow-up campaigns and nurture sequences the moment registrations come in.

Moreover, the Registered List updates in real time, so you always know exactly how many people have committed to your event at any given moment. Therefore, you can make data-driven promotion decisions throughout your entire campaign window. In short, your create webinar page with registration setup on Pageinar transforms raw audience interest into an organized, exportable lead database your team can act on immediately, without waiting for the event to conclude.

For best results, send a confirmation email to every registrant as soon as they sign up. Use the exported contact data to send reminders, pre-event resources, and promotional content through your preferred email platform. This approach keeps your audience engaged throughout the entire pre-event period, reduces your no-show rate on broadcast day, and sets the tone for a high-quality attendee experience before the event even begins.

Best Practices to Maximize Your Webinar Registration Page

To get the most from your create webinar page with registration setup, share your page link across every channel at your disposal. Promote it on social media, include it in your email newsletters, and embed it on your website homepage and relevant blog posts. The more targeted traffic you drive to the page, the more qualified leads you collect before the event begins. Think of your registration page as a dedicated campaign landing page and distribute it accordingly across all your active channels.

Second, use a specific, benefit-driven title for your event rather than a generic label. For example, ‘How to Double Your Email List in 30 Days Using Live Webinars’ converts far better than simply ‘Marketing Webinar.’ Third, enable the countdown timer in Registration Settings to create urgency and push undecided visitors toward signing up sooner. Additionally, add social proof to your webinar registration page such as a speaker bio, a recognizable partner logo, or a short testimonial from attendees of a previous event you hosted.

Furthermore, start promoting your webinar registration page at least two weeks before the event date. This gives your target audience enough time to discover the event, plan ahead, and block the date on their calendars. Together, an early promotion schedule and a well-designed registration page consistently produce strong attendance numbers and a more engaged live audience. In addition, consider running a short targeted social media ad campaign to reach potential attendees who are not yet part of your existing follower base.

Alternatively, build a short automated email sequence that runs in the days leading up to your broadcast. Each email in the sequence should include a direct link to your webinar registration page and a clear, action-oriented call to action. As a result, you stay top of mind with your audience throughout the entire pre-event window and recover potential registrants who may have visited the page but not yet completed sign-up.

Pageinar webinar landing page illustration 3

Going Live: From Registration to Broadcasting Mode

Once registration closes and event day arrives, switching from Registration Mode to Broadcasting Mode on Pageinar takes a single click. In Broadcasting Mode, your page immediately transforms from a sign-up form into a live event stage ready for your audience. Registered attendees who return to the same URL now see the live video broadcast area and the integrated group chat panel displayed side by side. As a result, the same link you shared for registration becomes your live broadcast hub without any additional setup or technical configuration required from you or your attendees.

Moreover, Pageinar records your broadcast automatically, so attendees who miss the live session can watch the replay at their convenience. After the broadcast ends, open the Broadcast Recordings tab in Settings to access, download, and share your recordings. This turns every live event into a piece of evergreen content you can repurpose for marketing campaigns, onboarding sequences, or internal training. For more ideas on running a compelling broadcast, read Unlock the Power of Seamless Webinars with Pageinar: Welcome to a New Era of Online Engagement! for a deeper look at maximizing your broadcast results.

Additionally, the group chat panel stays fully active throughout your entire broadcast, giving your audience a direct way to ask questions, share reactions, and connect with each other in real time. In fact, events with an active chat panel consistently report higher audience satisfaction scores and stronger post-event conversion rates compared to broadcast-only formats with no interaction layer built in.

Create Your Webinar Page with Registration Today

If you are ready to launch your next online event, there has never been a simpler time to create webinar page with registration on Pageinar. The platform handles everything from the branded sign-up form to the live broadcast stream and automatic recording, all on a single hosted URL that requires zero technical setup from your attendees. In other words, you get a complete end-to-end event platform in one place, with no code and no plugins required on either side of the screen.

Therefore, you can focus entirely on creating valuable content and growing your audience rather than wrestling with technical infrastructure. Visit Pageinar today, sign in with your Google account, and build your first webinar registration page in under ten minutes. Your next high-attendance webinar event starts right here.

Webinar Chat Without Login: Engage Attendees Instantly

Webinar chat without login is one of the most powerful tools for boosting audience engagement in live online events. Additionally, removing the login requirement means your attendees can join the conversation immediately, without friction. For example, a viewer who receives your webinar link can start typing in the chat within seconds. In fact, reducing sign-up steps dramatically increases participation rates across virtual events. Therefore, offering webinar chat without login is essential for any host who wants an active, engaged audience. Pageinar, an instant webinar and broadcast platform, has built this frictionless chat experience directly into every broadcast landing page.

Pageinar webinar landing page illustration 1

Why Webinar Chat Without Login Matters for Engagement

Every extra step between your viewer and your content reduces the chance they will participate. Moreover, forcing attendees to create an account or remember a password creates frustration. As a result, many potential participants simply give up before joining. In contrast, webinar chat without login removes that barrier entirely. Furthermore, it signals to your audience that you value their time and want to hear from them right away.

Online webinars have become a cornerstone of modern business communication. However, the technology can sometimes create unnecessary friction for attendees. For example, a first-time visitor who has never heard of your brand is far more likely to ask a question if they do not need to sign up first. In other words, lower barriers lead directly to higher engagement, more questions asked, and a more vibrant discussion during your broadcast.

However, frictionless access does not mean unmoderated chaos. Therefore, platforms like Pageinar offer hosts full moderation controls even when running webinar chat without login. For instance, you can set an offline message, manage chat themes, and control who appears as a speaker or viewer. In short, you get the best of both worlds: open access for attendees and full control for the host.

How Webinar Chat Without Login Works on Pageinar

Pageinar builds every broadcast landing page with a fully integrated group chat panel. Furthermore, this chat panel is visible to all viewers the moment they open your page URL. Therefore, there is no separate login screen or external chat app to install. In fact, the webinar chat without login experience is built directly into the broadcast page itself. As a result, your attendees see the live video player and the chat panel side by side, ready to use immediately.

When a viewer arrives at your Pageinar broadcast page, they can enter a display name and start chatting right away. Additionally, the chat updates in real time, so the conversation flows naturally during your presentation. For example, if you ask your audience a question during a product demo, attendees can respond instantly in the chat. Moreover, the host can pin important messages, moderate comments, and highlight key contributors, all from the same interface.

First, the host sets up the broadcast page on Pageinar. Second, the host shares the page URL with the target audience. Third, attendees click the link and land directly on the page. Finally, they type a display name and join the webinar chat without login. In other words, the entire process takes less than 30 seconds from click to conversation. Ideally, this is the experience every webinar host should offer their audience.

The Role of Chat in the Pageinar Broadcast Experience

Pageinar’s chat is powered by RumbleTalk, a professional group chat solution designed for live events. Furthermore, RumbleTalk supports multiple chat themes, moderation controls, and real-time messaging at scale. Therefore, when you run webinar chat without login on Pageinar, you are using enterprise-grade chat technology. Additionally, it allows hosts to set viewer and speaker roles, making it easy to manage large audiences. For example, during a 500-person webinar, the host can allow all viewers to chat. Alternatively, the host can restrict chat to approved speakers only.

Moreover, Pageinar’s chat settings let you customize the offline message attendees see before you go live. As a result, even before the broadcast starts, attendees can read a welcome message in the chat panel. In fact, this is a great way to build anticipation and keep early arrivals engaged. In addition, you can change the chat theme to match your brand colors, making the entire page feel cohesive and professional.

Key Features of Webinar Chat Without Login on Pageinar

Pageinar’s webinar chat without login comes packed with features that make it suitable for professional broadcasts of any size. Additionally, these features are all accessible through a simple settings panel, so no technical expertise is required. For example, a small business owner can configure a fully featured chat experience in just a few minutes. Therefore, Pageinar is ideal for teams who want professional results without a steep learning curve.

  • Instant access for attendees: Viewers join the chat immediately, without creating an account or entering a password.
  • Real-time group messaging: All chat messages appear instantly for every participant on the page.
  • Moderation controls: Hosts can remove messages, ban users, and manage who can post in the chat.
  • Custom chat themes: Choose from multiple visual themes to match your brand and event style.
  • Offline message: Set a custom message that attendees see before the broadcast starts.
  • Viewer and speaker roles: Control which attendees appear as speakers versus viewers in the chat panel.
  • Mobile-friendly design: The chat panel works seamlessly on smartphones and tablets, so attendees can join from anywhere.
Pageinar webinar landing page illustration 2

Setting Up Webinar Chat Without Login: A Step-by-Step Guide

Getting started with webinar chat without login on Pageinar is straightforward. Moreover, you do not need to install any plugins or configure third-party integrations. First, visit pageinar.com and log in with your Google account. Second, you will land directly on your broadcast landing page. Third, customize your page title, description, and cover image to match your event. Finally, share your page URL with your audience and let Pageinar handle the rest.

For a detailed walkthrough on going live, read our guide on how to start a live video on Pageinar. Additionally, you may want to review the registration settings if you plan to collect attendee information before the event. For example, you can require attendees to register with their name and company before accessing the broadcast page. However, the webinar chat without login feature remains open and requires no login once they are on the page. In other words, registration and chat access are two separate and independent settings.

Configuring Chat Settings for Your Event

After setting up your broadcast page, navigate to the gear icon to open the settings panel. Furthermore, click on Chat Settings to configure your webinar chat without login preferences. First, choose your chat type, which is Group Chat by default. Second, set your offline message so early attendees have something to read before you go live. Third, select a chat theme that matches your brand. In addition, you can assign a chat admin if you want a team member to help moderate the conversation during the broadcast.

For example, a corporate training webinar might use a clean, minimal chat theme. In contrast, a creative agency hosting a product launch might choose a bold, colorful theme. Therefore, Pageinar’s multiple theme options ensure that every webinar feels unique and on-brand. Additionally, you can toggle the display of viewer and speaker counts so your audience can see how many people are watching in real time. As a result, attendees feel part of a community rather than passive spectators.

Best Practices for Running Webinar Chat Without Login

Simply enabling webinar chat without login is a great start, but there are best practices that will maximize its impact. Furthermore, a well-moderated, actively managed chat transforms a passive audience into an engaged community. For example, encourage attendees to introduce themselves in the chat when they arrive. Additionally, ask interactive questions during your presentation and invite attendees to respond in the chat. As a result, the conversation becomes a dynamic part of the broadcast rather than an afterthought.

Moreover, designate a co-host or chat moderator to manage the conversation while you focus on presenting. For instance, the moderator can highlight great questions, remove off-topic messages, and keep the energy positive throughout the session. In addition, use the chat to gather real-time feedback on your content. For example, a quick prompt like ‘Type YES if this tip was helpful’ generates instant, visible engagement from the crowd. Therefore, your audience feels heard and valued throughout the event.

However, even with an open chat policy, it is important to set expectations at the start of the broadcast. For example, briefly explain the chat guidelines at the beginning of your session. Additionally, remind attendees that the chat is open to everyone and encourage respectful participation. In other words, a few seconds of setup time at the start creates a much healthier chat environment. Ideally, your attendees should feel comfortable asking questions and sharing reactions throughout the entire event.

Real-World Use Cases for Webinar Chat Without Login

Webinar chat without login is valuable across a wide range of industries and event formats. Additionally, its simplicity makes it accessible to any team, regardless of technical expertise. For example, here are the most common use cases where frictionless chat makes a measurable difference in audience engagement.

Corporate Training and Internal Webinars

Many organizations run regular internal training sessions and all-hands meetings. Moreover, employees attending these sessions are often on tight schedules and cannot afford extra sign-up steps. Therefore, webinar chat without login is a perfect fit for corporate training. For example, a company hosting a quarterly update for 200 employees can share a single Pageinar link. As a result, every employee can join the chat immediately without IT support or account provisioning. Additionally, the host can run live polls and Q&A sessions in the chat. These keep employees engaged throughout long presentations.

Product Launches and Marketing Events

Product launches demand high energy and maximum participation. Furthermore, a chat panel that requires no login removes the last reason an excited prospect might hesitate to engage. For example, a SaaS company launching a new feature can broadcast the announcement on Pageinar and let prospects ask questions in real time. Additionally, the host can use the chat to collect live feedback and gauge interest on the spot. In other words, the chat becomes a live focus group that generates immediate insights for the product team.

Educational Webinars and Online Courses

Educators and course creators benefit enormously from webinar chat without login. In fact, students who can ask questions without friction are more likely to stay engaged throughout a session. Moreover, instructors can use the chat to check understanding in real time. For example, after explaining a concept, the instructor can ask students to type their answer in the chat. As a result, the instructor gets instant feedback and can adjust the pace of the lesson accordingly. Additionally, students feel more connected to the learning experience when they can participate actively and see others doing the same.

Pageinar webinar landing page illustration 3

How Webinar Chat Without Login Gives You a Competitive Edge

Traditional webinar platforms often require attendees to create accounts before joining the chat. Furthermore, this creates a significant drop-off in participation, especially for first-time attendees. In contrast, webinar chat without login, as offered by Pageinar, eliminates that drop-off entirely. For example, an attendee who receives your event link five minutes before the broadcast can join the chat immediately, with no prior setup. Therefore, you capture engagement from even the most last-minute participants.

Additionally, traditional solutions often separate the chat from the broadcast in different windows or apps. However, Pageinar integrates the chat and the video player on a single hosted page. As a result, attendees never have to switch between tabs or apps during the event. In fact, this single-page experience is consistently praised by hosts and attendees alike. Moreover, because the page is fully hosted, there is nothing for attendees to download or install. In other words, the barrier to entry is essentially zero for anyone who receives your link.

For more on how Pageinar transforms live events from setup to broadcast, read Unlock the Power of Seamless Webinars with Pageinar: Welcome to a New Era of Online Engagement!. Furthermore, the insights in that post complement everything covered here about running a frictionless, high-engagement broadcast.

Start Using Webinar Chat Without Login Today

Webinar chat without login is no longer a luxury reserved for large enterprise platforms. Furthermore, Pageinar makes it accessible to any host, from solo creators to global enterprises. In fact, some of the world’s most recognized brands trust Pageinar for their live broadcast needs. These include Nasdaq, Wix, HP, and Sony Music. Therefore, you can be confident that the platform is built for professional-grade events. Additionally, getting started takes just minutes, with no plugins or technical setup required. In other words, if you want a broadcast where every attendee engages instantly and freely, Pageinar is the right choice. Visit pageinar.com today and host your first webinar chat without login in minutes.

Host Webinar with Chat on Website: The Complete Guide

Today, the ability to host webinar with chat on website has become one of the most powerful tools for businesses engaging their audience in real time. Whether you run a small consulting firm, a tech startup, or a large enterprise, adding a live webinar with integrated chat directly to your site transforms passive visitors into active participants. Furthermore, combining live video broadcasts with instant chat interaction increases attendee engagement, drives lead generation, and strengthens your brand authority. In this guide, you will learn exactly how Pageinar makes it simple to host webinar with chat on website, without writing a single line of code.

Pageinar webinar landing page illustration 1

Why You Should Host Webinar with Chat on Website

First, let us understand why hosting your webinar with chat directly on your own website matters. Many businesses rely on third-party platforms to run their webinars. However, sending attendees away from your site means losing control of branding, analytics, and the overall user experience. Additionally, keeping everything on your own domain builds trust and encourages visitors to explore more of your content.

Moreover, live chat is not just a nice-to-have feature. In fact, interactive webinars with real-time chat produce significantly higher engagement rates than recorded videos. Attendees who ask questions, share reactions, and talk with each other stay longer and convert at a higher rate. Therefore, if you want better results from your webinars, the combination of live video and group chat is essential.

Furthermore, Pageinar gives you a hosted broadcast landing page that you share via a URL. As a result, there is no plugin to install, no software for attendees to download, and no technical setup required. You simply share the link, and your audience joins instantly. In short, this approach removes every barrier between you and a live, interactive webinar experience.

Key Benefits of Hosting Webinars with Chat

  • Real-time audience interaction through live group chat
  • Full branding control on your own domain
  • Lead collection through registration forms before the event
  • Broadcast recordings saved automatically for replay
  • Password protection for exclusive or paid events
  • No attendee downloads or plugin installations needed

How Pageinar Lets You Host Webinar with Chat on Website

Pageinar is built specifically for creators and businesses that want to host webinar with chat on website quickly. In short, the platform gives you a single broadcast landing page combining everything: a live video player, an integrated group chat panel, registration tools, and attendee management. Ideally, you can go from zero to a fully live webinar in under five minutes. Together, these features make Pageinar one of the most accessible broadcast platforms available today.

First, you sign in to Pageinar’s webinar hosting platform using your Google account. After login, your main broadcast page is ready to customize immediately. You can set a cover image or background color, upload an avatar, add your event title, and write a description. Additionally, you can add social media links and set a page password for gated access.

Second, you choose between two page modes. Registration Mode shows a sign-up form to collect attendee details before the event. Broadcasting Mode switches the page to a live view with the video player and chat panel fully active. Together, these two modes give you a complete webinar funnel, from initial signup all the way through the live broadcast experience.

The Integrated Chat Panel

One of the most important features when you host webinar with chat on website is the quality of the chat experience. Pageinar integrates a RumbleTalk group chat panel, which provides a rich set of tools for managing your audience conversation. For example, you get full moderation controls, multiple visual themes, admin settings, and the ability to display viewer and speaker lists clearly.

Moreover, you can customize the offline message shown in the chat panel before your event goes live. Additionally, you can assign a dedicated chat admin to help moderate conversations during the broadcast. As a result, even large audiences can be managed smoothly without disrupting the flow of your presentation. In other words, Pageinar’s chat is not a simple comment box. It is a fully featured community tool embedded directly into your webinar page.

host webinar with chat on website using Pageinar broadcast page

Setting Up Your First Webinar with Chat on Website

Setting up is straightforward. Here is a step-by-step overview of how to host webinar with chat on website using Pageinar. Each step takes only a few minutes, and no technical knowledge is required at any point in the process.

  1. Log in: Visit pageinar.com and sign in with your Google account to access your broadcast page instantly.
  2. Customize your page: Add your event title, cover image, avatar, and description to match your brand identity.
  3. Set up registration: Open the Settings panel and go to Registration Settings. Toggle the lead fields you want, such as First Name, Last Name, Company, and custom fields.
  4. Switch to Registration Mode: Share your page URL with potential attendees so they can register before the event.
  5. Switch to Broadcasting Mode: When your event starts, toggle the page to Broadcasting Mode and click the Start Broadcast button.
  6. Engage with live chat: Your attendees see the live video and the chat panel side by side. They can start chatting immediately without any setup.

Additionally, you can review all registered attendees in the Registered List section of the Settings panel. Therefore, you always know exactly who is attending and can follow up after the event with personalized messages. For more details on going live, check out the guide on how to start a live video on Pageinar in the knowledge base.

Registration and Lead Collection

Before your broadcast begins, Pageinar lets you collect valuable attendee data. In fact, you can toggle on or off fields like First Name, Last Name, Company, Email, Phone, and fully custom fields. As a result, every registration becomes a qualified lead stored directly in your account and ready to export at any time.

Furthermore, the Registration Settings panel lets you set a background color, upload a header image or video, write a welcome message, and add a countdown timer. Therefore, your registration page feels as polished as any dedicated landing page tool. In addition, the timer creates urgency that increases show-up rates among registered attendees.

Password Protection for Exclusive Events

Moreover, if you want to restrict access to your webinar, Pageinar supports page password protection. For example, you can use this feature for paid webinars, private coaching sessions, or internal company broadcasts. Simply set a password in Broadcast Settings, and only attendees with the correct password can access the live page.

Pageinar webinar landing page illustration 2

Customizing the Chat Experience When You Host Webinar with Chat on Website

A great webinar is not just about the video content. In fact, many attendees say the chat interaction is what makes a webinar truly memorable. Therefore, Pageinar gives you full control over the chat experience through the Chat Settings panel in your account dashboard.

First, you can choose your chat theme from multiple visual options. Second, you can set an offline message that appears before the event goes live. Third, you can assign a dedicated chat admin who manages moderation from the admin view. Additionally, you can toggle whether viewers and speakers are displayed in the chat panel. As a result, attendees feel more connected, which encourages more active participation throughout the broadcast.

Chat Themes and Branding

Furthermore, the visual quality of your chat panel matters for brand perception. Pageinar offers multiple chat themes ranging from light and minimal to dark and vibrant. Ideally, you should pick a theme that complements your cover image and overall page design. In addition, you can change the theme at any time, even between separate events on the same page.

Managing Attendees and Recordings After the Event

After you host webinar with chat on website, the work is not over. In short, the post-event phase is where much of the long-term value lies. Pageinar automatically saves your broadcast recordings, which you can access anytime in the Broadcast Recordings section of the Settings panel.

Moreover, you can export the recording list along with duration and date information. Therefore, you can share replays with registrants who missed the live session, or repurpose the content across other marketing channels. Additionally, all your leads from Registration Mode are stored in the Registered List. You can search by name, filter by date, and export the full list for your sales team.

Using Recordings to Extend Your Reach

In fact, recorded webinars often generate more views than the live event itself. For example, you can post the replay link in follow-up emails, share it on social media, or embed it on a product landing page. Furthermore, each recording represents a piece of evergreen content that continues to drive traffic and generate leads long after the live event ends. As a result, every webinar you host becomes a lasting marketing asset for your business.

Pageinar webinar landing page illustration 3

Best Practices to Host Webinar with Chat on Website

However, having the right platform is only half the equation. You also need to follow proven best practices to make your webinars consistently successful. Here are the most important tips every host should know before going live.

  • Promote early: Share your registration page URL at least two weeks before the event using email, social media, and your website.
  • Warm up the chat: Post a welcome message in the chat before going live. This encourages early arrivals to start interacting right away.
  • Keep it focused: A 45-to-60-minute webinar with a clear agenda performs better than a long, open-ended session every time.
  • Moderate actively: Assign a chat admin to answer questions and keep the conversation on topic while you present.
  • Follow up fast: Send a thank-you email with the replay link within 24 hours, including a clear next step like a demo booking.

In addition, consider using a countdown timer on your registration page to create urgency. Pageinar’s Registration Settings include a show-timer toggle for exactly this purpose. Therefore, attendees are more likely to show up on time when they see a visible countdown ticking toward the event start.

Technical Tips for a Smooth Broadcast

Moreover, your broadcast quality depends heavily on your technical setup. Use a wired internet connection rather than Wi-Fi for maximum stability. Additionally, test your microphone and camera before going live to avoid surprises. In other words, a smooth technical experience builds credibility and keeps your audience focused on your content rather than technical issues. Furthermore, Pageinar’s broadcast area shows your OFFLINE or LIVE status clearly at all times. As a result, there is no guesswork about whether you are broadcasting or not.

Industries That Benefit from Hosting Webinars with Chat

First, almost any industry can benefit when they host webinar with chat on website. However, some sectors see especially strong results from this format. For example, SaaS companies use webinars to demo their product live and answer customer questions in real time. As a result, conversion rates from demo webinars are often two to three times higher than those from pre-recorded product tours.

Additionally, coaches and consultants use webinars to attract new clients by delivering high-value content in a live, interactive format. Moreover, event organizers use broadcast platforms to run virtual conferences, workshops, and panel discussions at scale. In fact, Pageinar’s partners include brands like Nasdaq, Wix, HP, and Sony Music, which shows that the platform is trusted across a wide range of industries and audience sizes.

Furthermore, educators and trainers use webinars to deliver live courses with real-time Q&A integrated into the session. Therefore, the combination of video instruction and live chat creates a classroom-like experience that recorded videos simply cannot replicate. According to research on web conferencing and online engagement, interactive formats consistently outperform passive viewing for knowledge retention and audience satisfaction.

Non-Profit and Community Use Cases

Additionally, non-profit organizations use webinars to communicate with donors, volunteers, and community members in a personal and engaging way. For example, a charity can host a live fundraising broadcast with a chat panel where supporters share encouragement and ask questions about the cause. In short, the interactive element of live chat transforms a one-way broadcast into a shared community experience that builds loyalty and deepens connection.

Conclusion: Start to Host Webinar with Chat on Website Today

In conclusion, the ability to host webinar with chat on website is no longer a complex or expensive undertaking. Pageinar makes it accessible to any business or creator, regardless of technical skill or budget. In fact, you can be live with a fully branded webinar page, integrated chat, and lead collection tools in just a few minutes from now.

Moreover, the combination of live video, group chat, registration tools, and broadcast recordings gives you everything you need to run professional webinars from a single hosted page. Therefore, there is no reason to pay for multiple tools or deal with complicated integrations. Alternatively, you can read about the broader platform experience in the post Unlock the Power of Seamless Webinars with Pageinar: Welcome to a New Era of Online Engagement! to see how others are using the platform.

Furthermore, Pageinar’s free plan lets you get started with no upfront cost. As a result, you can test the full experience with your real audience before committing to a paid subscription. In other words, there is genuinely no risk to getting started today and seeing the results for yourself.

Ready to host webinar with chat on website and engage your audience like never before? Visit Pageinar now, sign in with Google, and launch your first live broadcast in minutes. Your audience is waiting, and your next webinar is just a URL away.